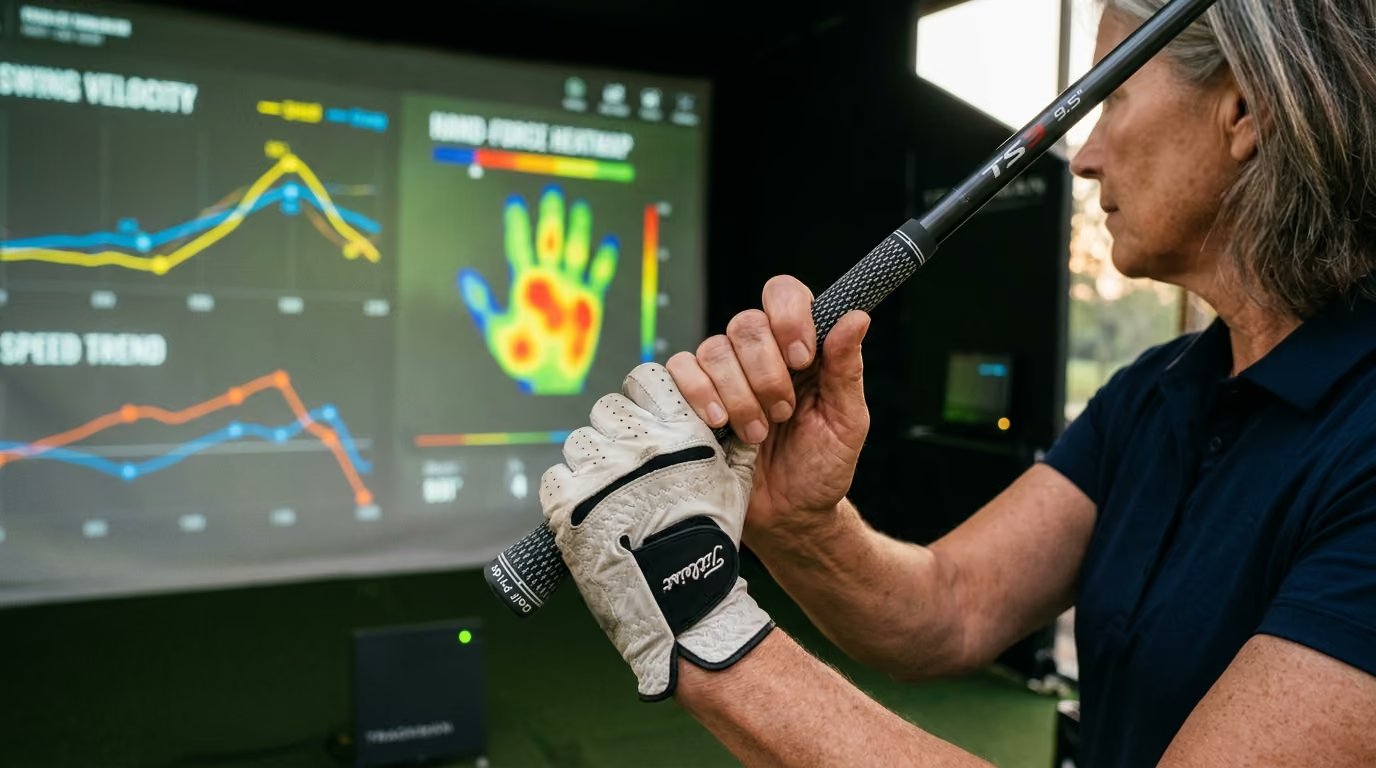
Discover how to prevent golf-related overuse injuries on your non-dominant side and maintain a strong, pain-free swing for years to come.




Many golfers search the internet for answers to one common question. Why does the right side of my body hurt after eighteen holes of golf? Most golf instruction focuses on the lead side of your swing. We hear about the importance of lead side clearance. We study how to post up on the lead leg.
Yet the trail side of the body often carries the heaviest physical burden. For a right handed player, the trail side is the right side. During a typical round, this side acts as both the primary motor and the main braking system. This repetitive stress can lead to chronic wear and tear.
The mature golfer must understand these unique physical demands. Decades of asymmetrical movement can create significant muscle imbalances. If you neglect these patterns, your swing will lose speed. Even worse, you may face chronic injuries that keep you off the course.
This comprehensive guide offers a clear path to protecting your body. We will look at the science behind trail side injuries. We will also provide practical exercises to maintain your golf longevity for decades to come.
Our goal is to help you play pain free golf. We want to extend your playing years. You do not need to accept chronic pain as a normal part of aging. With the right knowledge, you can keep your joints healthy and your swing strong.
Imagine standing on the fifteenth tee box late in the afternoon. Your match is close, and you need a long drive to clear a fairway hazard. You feel a slight stiffness in your right hip, but you ignore it. You take a big backswing and transition hard into your downswing.
As you follow through, you feel a sharp pinch in your right lower back. A dull ache also flares up in your right knee. You watch your ball fly down the fairway, but you cannot hold your finish. You immediately bend over to rub your sore lower back.
For the rest of the round, you swing with a modified, defensive motion. You try to protect your aching back by slowing down your hips. Your drives lose twenty yards, and your contact becomes inconsistent. By the final putt, your entire right side feels completely exhausted.
This scenario is very common for golfers over forty. The pain rarely starts during the slow backswing phase. It occurs when your body tries to slow down the high speed club. This sudden deceleration puts massive pressure on joints that are already stiff.
When your swing lacks smooth deceleration, your muscles must work overtime. This causes sudden spasms in your lower back. Your trail knee twists because your foot is stuck. Your trail shoulder pinches as it tries to halt the club.
The mental toll of this pain is also significant. Once you feel that sharp pinch, you lose confidence in your swing. You start to steer the ball instead of swinging freely. This defensive play usually leads to worse scores and more physical tension.
To protect your body, you must understand the physical forces of the swing. Biomechanists use the term crunch factor to describe a major cause of lower back pain. This occurs when you combine rapid lateral side bending with high speed spinal rotation.
During the downswing, your spine must bend sideways toward the target. At the exact same time, your torso rotates rapidly. This combination of movements concentrates mechanical stress on your lower lumbar joints. The L4 and L5 vertebral segments take most of this abuse.
Research shows that the golf swing generates peak compressive loads on your lower spine. These loads can measure six to eight times your body weight. For a golfer weighing 180 pounds, that means over one thousand pounds of pressure. This force is applied repeatedly over a four hour round.
Many players assume that injuries occur at the moment of impact. Biomechanical data tells a very different story. Studies show that approximately 41.6 percent of golf injuries occur during the follow through phase. In contrast, only 17.8 percent of injuries happen at the moment of impact.
This difference is caused by the force required to stop the golf club. If your trail hip lacks flexibility, your lower back must twist extra hard. This compensation leads to a swing fault called the reverse C finish. This position places extreme shear loads on your spinal discs. It is a major obstacle to proper injury prevention on the course.
The lumbar spine is not built for rotation. The facet joints in your lower back allow for forward and backward bending. They only allow for a few degrees of rotation. When you force them to twist while bent sideways, these joints collide.
This collision creates microtrauma in the joint cartilage. Over time, this leads to arthritis, disc bulges, and muscle spasms. The mature golfer must learn to rotate through the hips instead of the lower back. This shift is critical for long term spinal health.
The thoracic spine is designed for rotation. Your mid back can twist much more freely than your lower back. However, if your thoracic spine is stiff, your lumbar spine is forced to rotate. This transfer of movement is where many spinal injuries begin.
Keeping your core strong helps protect these delicate spinal joints. The abdominal muscles act as a natural corset. They stabilize your pelvis during the high speed downswing. Without core support, your spine must bear the full force of the crunch factor.
The sciatic nerve runs down your lower back and through your hips. When the crunch factor compresses your L4 and L5 vertebrae, it can pinch these nerves. This pinch leads to a sharp, burning pain down your trail leg.
This condition is commonly known as sciatica. It can make walking and standing extremely uncomfortable. For a golfer, sciatica is a major setback that requires weeks of recovery.
Preventing this compression is far easier than healing a damaged nerve. By maintaining your hip mobility, you reduce the need for spinal bending. This simple change keeps your nerve paths clear and healthy.
If you ever feel numbness or tingling in your trail leg, stop playing immediately. These are warning signs of serious nerve compression. Consult a medical professional before returning to the golf course.
Another common swing fault is the reverse spine angle. This occurs when your upper body tilts toward the target at the top of the backswing. This position makes it impossible to clear your hips correctly.
During the downswing, you must tilt your spine away from the target to make contact. This sudden change in direction increases the crunch factor significantly. It places an uneven load on the trail side muscles of your lower back.
This fault often stems from a desire to create a longer backswing. Golfers with tight hips will tilt their spine to simulate a full turn. This illusion of power actually drains your speed and damages your joints.
To correct this, focus on a shorter, more compact backswing. Keep your spine angle stable as you turn. This simple adjustment will reduce the lateral shear forces on your lower vertebrae.
The trail knee is another common site for golf injuries. Many players focus all their attention on the lead knee. However, the trail knee actually experiences unique and dangerous physical forces.
During the downswing, your trail knee must withstand a force called net abduction moment impulse. This force pushes your knee inward toward your other leg. This movement is often described as a valgus collapse.
Professional motion capture studies show that the trail knee faces high net abduction moments. These forces are measured at -0.518 Nms.kg−1 for the trail knee. The lead knee faces a much lower force of -0.135 Nms.kg−1. This means your trail knee faces nearly four times the stress of your lead knee.
This extreme force puts your trail side medial meniscus at risk. The meniscus is a cartilage shock absorber inside your knee joint. When your knee twists under high load, this cartilage can easily tear.
Now let us look at the trail arm. Amateurs often suffer from medial epicondylitis, which is commonly known as golfer's elbow. This is an overuse injury of the tendons on the inside of the elbow.
Research shows that 65 percent of golf related elbow injuries occur on the trail side. During the downswing, a muscle called the pronator teres becomes highly active. This muscle helps turn your forearm and wrist.
If your swing mechanics are poor, this muscle must work too hard. Many players release their wrist angle too early in the downswing. This fault is known as flipping or scooping the ball.
This early release causes the club head to pass the hands before impact. It is a common compensation for a weak or open clubface. The golfer tries to use their trail hand to force the club square.
The trail shoulder also experiences extreme forces during the follow through. As you release the club, your trail arm must swing across your chest. This movement requires the muscles on the back of your shoulder to contract eccentrically.
The infraspinatus and teres minor are key rotator cuff muscles. They act as the primary brakes for your arm. If you swing with high speed, these small muscles must work incredibly hard to stop the club.
Over time, this eccentric deceleration load can cause micro tears in the rotator cuff. This leads to chronic shoulder pain and weakness. Mature golfers often mistake this pain for simple muscle soreness.
To protect your trail shoulder, you must allow your chest to rotate fully. If your chest stops turning, your arm must decelerate independently. This isolation increases the strain on your rotator cuff significantly.
To prevent elbow strain, you must maintain proper wrist angles. Your trail wrist should have more extension at impact than it did at setup. This means your wrist stays bent back slightly as you hit the ball.
When you flip your wrist, you force the forearm muscles to contract eccentrically. This means they are trying to lengthen while under high tension. This eccentric overload is the primary cause of trail side elbow pain.
Maintaining wrist extension allows the larger muscles of your body to square the club. Your hips and core should drive the movement, not your hands. This shift in power protects your delicate elbow tendons from repetitive strain.
It also improves your compression of the golf ball. A stable trail wrist delivers a more consistent clubface angle at impact. This leads to cleaner contact and more predictable ball flights.
Your forearm muscles control the fine movements of the club face. When these muscles are tight, they pull on the tendons in your elbow. This tension is magnified when you swing with a tight grip.
Mature golfers often suffer from wrist stiffness. This stiffness forces the forearm tendons to absorb more shock at impact. This shock leads to chronic inflammation in the trail elbow.
To protect your elbow, you must practice soft hands. Your grip pressure should feel like a five out of ten. This light pressure allows your wrist to move naturally without straining your forearm.
It also allows the club to release smoothly through impact. You will find that your shots feel softer and go farther. Softer grip pressure is a simple way to protect your arms.
You do not have to wait for your next gym session to protect your body. You can make a simple change during your round today. This quick fix will immediately reduce stress on your trail knee and back.
The key to this adjustment is releasing your trail foot. Many golfers try to keep their trail foot glued to the turf. They believe this anchor provides a more stable base.
In reality, pinning your trail foot traps your pelvis. Your hips cannot rotate fully, which forces your knee and lower back to twist. To fix this, focus entirely on turning your trail hip.
As you swing through impact, let your trail heel lift naturally. Allow your trail foot to roll onto the inside of your big toe. Your shoe laces should face the target at the end of your finish.
You can also make a minor adjustment to your setup. At address, flare your trail foot outward by about ten degrees. This simple change pre-opens your trail hip joint.
Flaring your foot makes it easier to load into your trail hip during the backswing. It also reduces the amount of rotation required during the follow through. This is an easy way to protect a stiff joint.
It requires no extra physical strength to implement on the tee. It works with your current flexibility level instead of fighting against it. You will find that your backswing feels deeper and more comfortable immediately.
Many professional players use this foot flare to ease joint stress. It is a proven adjustment for players who want to protect their lower back. Try this simple change on your very next shot.
A fast transition from the top of the backswing increases joint stress. When you rush the downswing, your muscles must contract with extreme violence. This sudden movement spikes the spinal compression loads.
Try to focus on a smooth, rhythmic transition. Give your hips time to shift before you swing the club down. This smoother tempo reduces peak forces on your trail side joints.
Think of your swing as a gradual build up of speed. The fastest part of your swing should be at the ball, not at the top. This change in rhythm will make your contact more consistent.
It also gives your nervous system time to coordinate your muscles. Your body can prepare for the deceleration phase more effectively. This reduces the risk of sudden muscle pulls or joint pinches.
To achieve lasting relief, you must address the root cause of your tightness. For most golfers, the issue is a lack of trail side mobility in the hips. When your hips are locked, your lower back and knees must overwork.
Research shows a strong connection between hip mobility and swing performance. Golfers with a combined total of trail side hip and trunk rotation of at least 100 degrees are more successful. They are 1.51 times more likely to achieve swing speeds of 100 mph or higher.
You can improve this rotation with a daily exercise called the 90/90 stretch. This drill targets both internal and external rotation of the hips. It is a highly effective tool for mature players.
Start by sitting on a comfortable mat on the floor. Place your right leg in front of you. Bend your right knee at a ninety degree angle. Your right thigh should point straight ahead.
Now, place your left leg behind you. Bend your left knee at a ninety degree angle. Your left thigh should point directly to the side. Your legs should form two ninety degree angles on the floor.
Sit up as tall as you can. Keep your spine straight and your chest high. Place your hands on the floor for support if you need to.
Slowly turn your torso toward your front leg. Lean forward slightly from your hips, keeping your back flat. Hold this position for thirty seconds while taking deep breaths.
If your hips are very tight, you may find it hard to sit upright. You can place a yoga block under your hips to raise your pelvis. This modification reduces the intensity of the stretch and protects your knees.
Never force your body into pain during this exercise. The stretch should feel deep but comfortable. Focus on slow, steady breathing to help your muscles relax.
Next, return to the upright starting position. Now, slowly turn your torso toward your back leg. Keep both hip bones anchored firmly to the floor.
You will feel a deep stretch in the front and side of your back hip. This targets internal rotation, which is vital for loading your swing. Hold this stretch for thirty seconds.
Perform this routine for two minutes on each side. Do this stretch three times per week. Consistent practice will help you build the physical strength and mobility needed for a healthy swing.
This routine targets the deep rotators of your hip joint. These muscles often become tight from prolonged sitting. Restoring their length is a key step toward long term joint health.
As your flexibility improves, you can progress the 90/90 stretch. Try lifting your hands off the floor completely. This forces your core muscles to stabilize your spine during the movement.
You can also add active hip lifts from this position. Gently press your knees into the floor and lift your hips. This movement builds strength in your hip rotators at their end range of motion.
Building active mobility is far more valuable than passive flexibility. It teaches your nervous system how to control your joints during the swing. This control is your best defense against on-course injuries.
Always move slowly when progressing these exercises. Never bounce or force a movement. Your body will adapt gradually over several weeks of consistent practice.
Your muscles rely on water to remain flexible. Dehydrated muscle tissue is much more prone to micro tears and spasms. This is especially true for the deep rotational muscles of your trail hip.
During a four hour round, your body loses a significant amount of water. If you do not replace this fluid, your muscles will tighten up. This tightness increases your risk of injury on the back nine.
Make it a habit to drink water on every single tee box. Do not wait until you feel thirsty to start hydrating. By then, your muscles are already in a state of mild dehydration.
Avoid sugary drinks or excessive caffeine on the course. These fluids can actually speed up dehydration. Stick to clean water or water with electrolyte tablets for the best results.
When golfers try to fix trail side pain, they often make common mistakes. These mistakes can actually increase your risk of injury. It is important to recognize these errors before they cause damage.
The first mistake is the hanging back fallacy. This occurs when a golfer stays on their trail foot through impact. They do this because they are afraid of shifting weight onto a stiff lead side.
Hanging back keeps your trail knee bent and torqued under your body weight. It also forces your lower back to bend backward to lift the ball. This movement increases the lateral shear forces on your spine.
A proper swing requires your weight to transfer to your lead side before impact. This lateral shift allows your trail side to release safely. Hanging back prevents this release and traps your joints in a dangerous position.
The second mistake is the flying elbow misconception. Some golfers try to fix elbow pain by keeping their trail elbow pinned to their ribs. This restriction actually prevents the natural release of the club.
When you pin your elbow, your hands must work harder to square the club. This leads to the wrist flipping we discussed earlier. It increases the strain on your pronator teres muscle.
Allow your trail elbow to move naturally. It should fold on the backswing and extend fully through impact. This natural movement protects both your shoulder and your elbow.
The trail shoulder must also clear during the follow through. If you restrict its movement, you place high eccentric loads on your rotator cuff. This can lead to shoulder impingement or tendon tears over time.
Focus on keeping your trail shoulder relaxed. Let it follow the rotation of your chest. This coordinated movement reduces the workload on your arm muscles.
Many mature players try to swing the club as far back as possible. They see younger golfers on television with massive shoulder turns. They believe they must match this range of motion to hit the ball far.
However, forcing a big turn on stiff joints leads to a reverse spine angle. Your body cannot rotate, so it tilts instead. This tilt puts your spine in a highly vulnerable position.
A shorter backswing that stays in your physical limits is much safer. You can still generate plenty of speed with proper sequencing. Focus on a clean strike and solid contact instead of raw swing length.
A controlled swing protects your trail side joints from extreme stress. It also improves your accuracy and consistency off the tee. You will hit more fairways and finish your rounds without pain.
The third mistake is attempting deep stretches without warming up. Mature muscles require gradual movement to increase blood flow. Static stretching before a round can actually decrease muscle strength.
Always perform active mobility exercises before you swing a club. Save the deep holding stretches for after your round. This approach supports faster muscle recovery and prevents strains.
A simple warm up should include arm circles, gentle torso twists, and leg swings. These movements prepare your nervous system for the demands of the swing. They help prevent sudden muscle pulls on your first tee shot.
Spend five to ten minutes warming up before you hit balls. This small investment of time will pay massive dividends for your physical health. It is a critical habit for any golfer over forty.
Your equipment choices can directly impact the stress placed on your trail side. Simple changes to your gear can offer significant joint protection.
Let us look first at your golf shoes. Traditional shoes with metal or heavy plastic spikes lock your feet to the ground. While this provides traction, it prevents your trail foot from releasing.
This restriction forces your trail knee to absorb all the rotational torque. Consider switching to spikeless shoes or shoes with flexible outsoles. These shoes allow your trail foot to rotate more naturally.
This small change reduces the net abduction moment on your trail knee. It allows your heel to rise freely, which protects your medial meniscus.
Modern spikeless shoes still offer excellent grip. They utilize advanced tread patterns that grip the turf without locking your joints. This balance of traction and freedom is ideal for the mature golfer.
Many players find that spikeless shoes are also more comfortable to walk in. This reduction in walking fatigue can help you maintain your posture on the back nine. It is a simple upgrade for your physical health.
Next, examine the size of your club grips. If your grips are too small, you must squeeze the club tightly to maintain control. This high grip tension travels straight up your forearm.
Tense forearm muscles cannot absorb the shock of impact. This vibration goes directly into your elbow joint, leading to golfer's elbow.
Switching to midsize or jumbo grips can reduce your grip pressure instantly. Larger grips allow your hands to relax, which reduces pronator teres muscle activity. This helps you maintain trail wrist extension through impact.
You can test your grip tension by holding a club and trying to wiggle your fingers. If your forearm muscles feel hard, your grip is too tight. A larger grip will help you maintain a softer, more relaxed hold.
This reduction in muscle tension also improves your swing speed. Relaxed muscles can contract faster than tense muscles. This means a larger grip can actually help you hit the ball farther.
The stiffness of your club shafts also matters. If your shafts are too stiff, you must swing faster to bend them. This extra effort increases the physical load on your joints.
Stiff shafts also transmit more vibration to your hands and arms at impact. If you suffer from trail elbow pain, consider switching to graphite shafts. Graphite absorbs shock much better than steel.
This reduction in vibration can protect your joints from microtrauma. It is a simple way to extend your playing years without pain.
Confirm your shafts match your current swing speed. Do not play shafts that are too stiff out of pride. A softer shaft flex will make the game easier and much more comfortable for your body.
Your feet are the foundation of your entire swing. If your arches collapse, your ankles and knees will roll inward. This misalignment increases the valgus stress on your trail knee.
Consider using custom orthotics or supportive insoles in your golf shoes. Proper arch support keeps your feet aligned during the swing. This alignment helps distribute the rotational forces more evenly.
It prevents your trail knee from buckling inward during the downswing. This protection is especially important for golfers with flat feet. Supportive footwear can significantly reduce joint wear and tear.
Take time to find shoes that offer both support and flexibility. Your joints will thank you after a long walk on the course. It is an investment in your physical longevity and performance.
To maintain your physical health on the course, you must protect your non dominant side. The trail side of your body deserves the same attention you give to your lead side.
Focus entirely on turning your trail hip and letting your trail heel rise naturally before your next round.
Here is your actionable checklist to apply this week:
Follow Golfergy for practical insights on performance, mobility, recovery and healthy ageing. Stay connected for new articles, research-led guidance and ideas to help you play better for longer.


Explore practical resources on performance, recovery, mobility and golf longevity.
Read the Blog