Learn how to safely return to golf after knee replacement surgery with timelines, drills, and swing adjustments designed to rebuild your game stronger than ever.




Most golfers view a joint replacement as a permanent downgrade to their physical game. They believe a prosthetic joint will rob them of power, flexibility, and consistency. In reality, a total knee replacement can be the catalyst for your best years on the course. By removing chronic joint pain, you can rebuild a swing that is highly efficient and repeatable. This guide details exactly how to manage this transition safely.
The saddest thing I have seen in golf is watching lifelong playing partners slowly drop out of our weekend group. It usually starts with a nagging shoulder or knee issue they ignore until it requires surgery. That pattern is exactly why I became obsessed with golf longevity. We do not have to stop playing as we age, provided we do the right maintenance work between rounds.
For decades, the common advice after major joint surgery was to take up a less demanding hobby. Doctors worried about the longevity of the implant, fearing the sudden twisting forces of the golf swing. Today, modern materials and improved surgical techniques have changed the situation completely. You can return to the sport you love with confidence, provided you follow a structured plan.
According to research published in the Journal of Arthroplasty, the vast majority of golfers return to the course after surgery. In fact, 85 percent of players are back on the green within about 7.9 months. They do not just return to play, they often play with significantly less pain. On a visual analog scale, average knee pain dropped from 6.13 out of 10 down to just 1.27. Handicap levels remained remarkably stable, and some players even showed a slight improvement. This manual will show you how to join those successful golfers.
Imagine you are standing in the middle of the rough on the fifteenth hole. You have a 150-yard shot to an elevated green. The ball is sitting down in thick grass, requiring a steep angle of attack. You take a solid five-iron and swing with full force. As the clubhead strikes the dense turf, it slows down abruptly.
At this exact millisecond, your body weight is transferring rapidly to your lead leg. Your lead knee must absorb the sudden deceleration of the club. It must also handle the twisting force of your hips turning toward the target. If your joint is weak or poorly aligned, this moment creates an intense shearing force. Your knee buckles slightly, and a sharp warning pain shoots through your leg.
This on-course situation shows how golf movements place unique demands on your body. You cannot simply swing harder to make up for a weak joint. You must understand the forces at play and prepare your body to handle them. This is why a systematic approach to golf longevity, performance, and recovery is so important.
To recover successfully, you must follow a milestone-based framework. Do not look at the calendar to decide when you are ready for the next step. Your body does not care about weeks or months. It cares about strength, stability, and range of motion. If you try to progress before your knee is ready, you risk damaging the healing tissues.
The first phase is the Foundation Phase, which lasts from week zero to week six. During this initial period, your primary goal is to regain full knee extension. You must be able to straighten your leg completely. If you cannot straighten your leg, you will walk with a limp. This limp will ruin your golf stance and put extra pressure on your lower back. You must also focus on waking up your quadriceps muscles through simple leg raises.
To wake up your thigh muscles, perform simple quadriceps contractions daily. Sit on a flat surface with your leg extended straight in front of you. Press the back of your knee down into the floor while squeezing your thigh muscle. Hold this contraction for ten seconds, then release. Perform this exercise ten times, three times a day, to build a strong foundation.
The second phase is the Fine Motor Control Phase, spanning weeks six to ten. This is when you can introduce very light golf activities. You are not swinging a driver yet. Focus entirely on putting and chipping. These short-game movements require minimal rotation of the hips and knees. They help you reconnect with the feel of the turf. They also build confidence in your balance without stressing the healing joint capsule.
Chipping practice should be done with a very narrow stance. Keep your feet close together, which naturally limits your backswing and downswing length. This setup prevents your hips from turning aggressively, protecting your knee joint while allowing you to practice your touch. Focus on clean contact. Keep your practice sessions to fifteen or twenty minutes at a time. If you experience heat or throbbing in the joint afterward, apply ice immediately.
The third phase is the Controlled Loading Phase, which occurs during weeks ten to sixteen. At this point, you can progress to partial swings. Grab your pitching wedge or a short iron and make half-speed swings. Focus on smooth weight transfer rather than speed. You can also start playing a few holes of golf. We recommend playing nine holes while riding in a golf cart. This keeps your total steps low while letting you enjoy the course.
When practicing half-swings, use a tee. Teeing the ball up removes the risk of hitting the turf too hard. Hit-shock can send sudden vibrations up the shaft and into your joints. Use short irons like an eight-iron or nine-iron. Focus on a smooth tempo. Your swing speed should feel like fifty percent of your maximum effort.
The final phase is the Full Return Phase, starting around month four to six. This is the transition to full-speed swings with your long irons and wood clubs. Your prosthetic joint is now well-anchored in the bone. The surrounding ligaments have healed and tightened. You can begin to phase out the cart and walk the course. Always build up your walking distance gradually over several weeks.
The driver requires a wide stance and a sweeping motion. This wide stance can place extra lateral stress on your knees. To prevent this, flare your feet even further when hitting your driver. This extra flare opens up your hips and allows for a wider, safer swing path. Build up your stamina by hitting ten drivers at the range, then resting for five minutes.
According to research from Rothman Orthopaedics, rushing these phases is the leading cause of post-operative pain. Your bone needs time to grow into the textured surface of the implant. This process, called osseointegration, takes several months to complete. Pushing too hard too early can disrupt this bond. Respect the timeline, and let your body guide your progress.
To understand why these adjustments are necessary, you must understand how an artificial knee works. A natural knee is a complex biological system. It is made of bones, cartilage, ligaments, and tendons that allow for three-dimensional movement. It can bend, slide, and rotate slightly. The meniscus acts as a natural shock absorber, cushioning the bones from impact.
A prosthetic knee is a mechanical device. It is typically made of three components: a metal femur shell, a metal tibia tray, and a medical-grade plastic spacer in between. This system is designed primarily to act as a hinge, bending forward and backward. While modern designs allow for a tiny amount of rotation, they cannot match the complex rotational capabilities of a natural knee. If you force the artificial knee to twist aggressively under load, you place immense stress on the implant interfaces.
This stress is concentrated where the metal components are bonded to your bone. Most knee replacements are held in place using bone cement. Over time, high shear forces can cause this cement to develop micro-fractures. If the cement breaks down, the implant can become loose, leading to pain and requiring a revision surgery. By modifying your swing, you redirect these forces away from the knee joint and into your hips and core.
Furthermore, the plastic spacer in your artificial knee is subject to wear and tear. When the knee is aligned properly, the weight is distributed evenly across the surface of the plastic. However, if your knee collapses inward or twists excessively during your swing, the load becomes concentrated on one side of the spacer. This uneven loading causes the plastic to wear out much faster, reducing the lifespan of your knee replacement. Proper swing mechanics guarantee that your joint lasts for decades.
The demands placed on your knees during a golf swing are highly asymmetrical. Your lead knee and your trail knee perform completely different jobs. For a right-handed golfer, the lead knee is the left knee, and the trail knee is the right knee. Knowing which knee was replaced is critical. It determines the specific adjustments you must make to your swing.
Let's talk about the lead knee first. The lead knee is at a much higher risk of injury and wear during the swing. During the downswing and follow-through, this joint must absorb massive vertical forces. It must also handle rapid internal rotation. As you release the club, your body weight shifts onto a flexed lead leg. The knee must act as a solid pivot point while twisting under pressure. This combination of compression and rotation creates high shear stress.
Research from the Titleist Performance Institute shows that the lead knee is subject to horizontal, vertical, and rotational forces during the downswing. The vertical force peaks just before impact, reaching up to four times the golfer's body weight. This means if you weigh 200 pounds, your lead knee must support up to 800 pounds of pressure at impact. If your lead knee is a prosthetic joint, you must realize that this joint is bearing that entire load while trying to rotate.
If your lead knee is the prosthetic joint, your primary goal is protection. You must find ways to reduce this rotational stress. If you do not, you may experience pain or premature wear of the plastic spacer in your new joint. Your swing adjustments must focus on letting the lead hip turn freely. This prevents the knee from twisting against the ground.
The trail knee has a very different role. It is responsible for power initiation during the backswing. As you turn back, your weight shifts onto your trail leg. This joint must resist lateral sliding while supporting your body weight. The trail knee handles high vertical forces but experiences far less rotational shear than the lead knee. If your trail knee was replaced, your focus should be on building lateral stability and preventing a swaying motion.
The trail knee acts as an anchor during the loading phase. It pushes against the ground to transfer energy upward through your pelvis. While it must support weight, it does not experience the same violent twist as the lead knee does at impact. Understanding this difference helps you customize your swing adjustments. If your lead knee is the prosthetic joint, your focus is on releasing rotation. If your trail knee is the prosthetic joint, your focus is on controlled lateral loading.
If you have a trail knee replacement, you may be able to return to full swings slightly faster than if you had a lead knee replacement. This is because the trail knee is not subjected to the same violent forces at impact. However, you must still follow the milestone-based framework. Do not rush your recovery just because you feel good. Both knees require proper muscle support to remain stable.
Protecting your new knee requires changing how your body rotates. You cannot swing the club the exact same way you did twenty years ago. Fortunately, these technical changes can actually improve your contact with the ball. They make your motion more fluid and less reliant on raw muscle power. Here are the four key adjustments you should make.
The first modification is foot flaring. At setup, turn both of your feet outward by 20 to 30 degrees. Most amateur golfers set up with their feet perfectly square to the target line. Square feet lock your hips and force your knees to do all the twisting. By flaring your feet, you open up your hip joints. This allows your hips to rotate easily during the swing, which immediately removes twisting forces from both knees.
Flaring your feet outward has a profound effect on your pelvis. When your feet are flared, your thigh bones are pre-rotated outward in the hip sockets. This pre-rotation increases your hip mobility. It allows your pelvis to turn further and more easily. If your hips can turn freely, your lower back and knees do not have to twist to compensate. This is especially important for mature golfers who may already have stiff hips. Flaring your lead foot by 30 degrees is the single most effective way to protect a lead knee replacement.
The second modification is the heel lift. During your backswing, allow your lead heel to rise slightly off the turf. This is a classic swing element used by many great players in history. Lifting the heel prevents the lead knee from buckling inward too much. It also allows your hips to turn further. On the downswing, let your trail heel lift early as you move toward impact. This prevents the trail knee from getting trapped and torqued.
The modern swing focuses on maximizing the rotational separation between the shoulders and the hips. This style of swing requires a quiet lower body and a planted lead heel. While this can generate high ball speeds, it places extreme rotational torque on the lower back and knees. For recreational golfers over forty, and especially those with a joint replacement, this style is highly dangerous.
Instead, you should adopt the classic swing style. The classic swing allows the lower body to move dynamically. The hips rotate fully during the backswing, and the lead heel lifts off the ground. On the downswing, the body shifts forward smoothly, and the trail heel lifts early. This style of swing is much easier on your joints. It distributes the forces of the swing across your entire body rather than concentrating them in your knees and lower back.
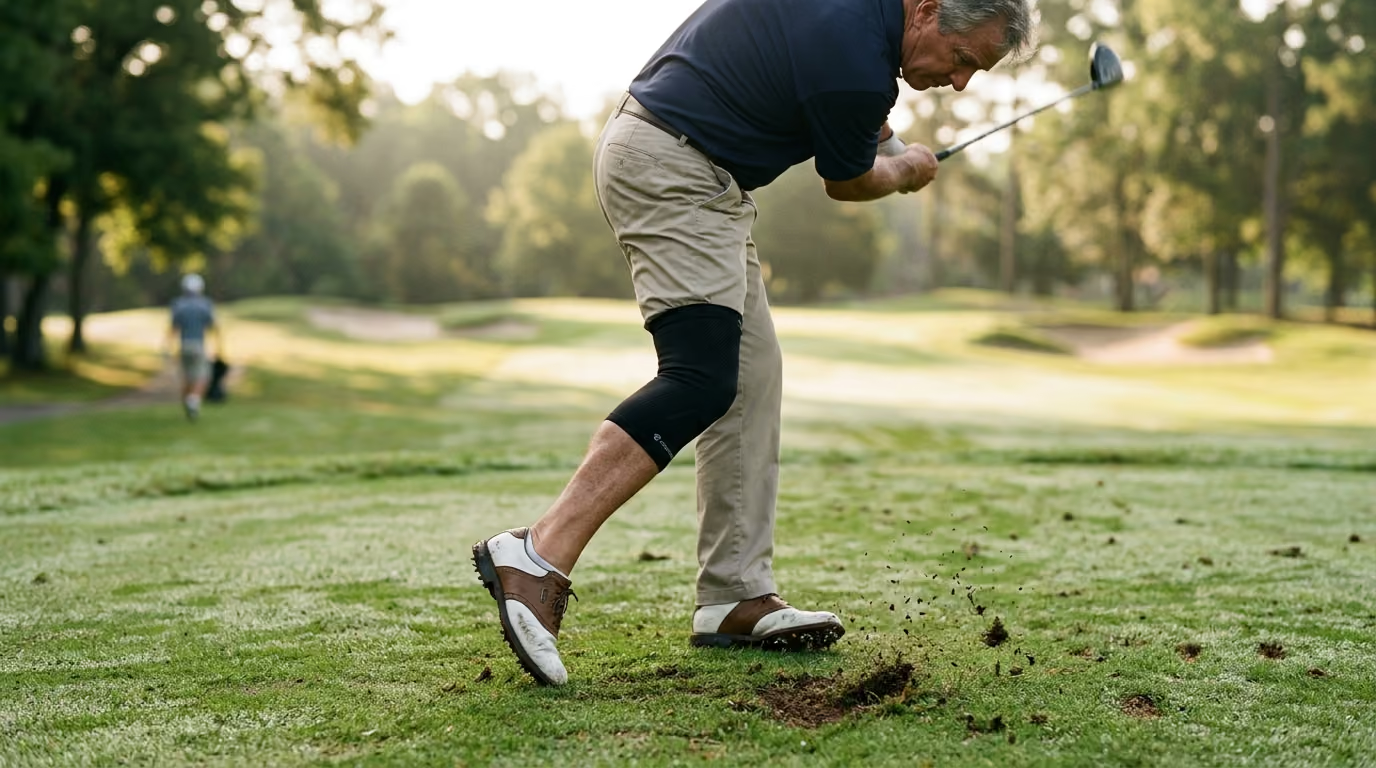
The third modification is the modified finish. We highly recommend using a step-through finish if your lead knee was replaced. Instead of trying to hold a classic, rigid follow-through, let your trail foot step forward toward the target. This step should happen naturally right after you strike the ball. It releases all the rotational stress on your lead leg. Your lead knee is no longer acting as a fixed, twisting axis.
The step-through finish is often called the Gary Player finish. Gary Player used this move throughout his career to protect his back and joints. To practice this, make a swing and let your trail foot step completely forward toward the target as you follow through. Your body weight shifts entirely onto a straight, relaxed lead leg, and then your trail leg takes a step. This converts the violent rotational stop of the follow-through into a gentle forward walk. It is an excellent way to maintain swing speed while completely eliminating the shear force on your lead knee.
The fourth modification is a shortened backswing. Try to limit your backswing to a three-quarter position. You do not need to wrap the club around your head to generate speed. A shorter backswing keeps your body in balance. It reduces the peak torque applied to your knees at the transition point. You can maintain your distance by focusing on a solid center-face strike rather than a wider swing arc.
Many golfers believe that a shorter backswing means shorter drives. This is not necessarily true. A shorter backswing helps you maintain your balance and posture. When you over-swing, your body tilts and slides, which leads to poor ball contact. By keeping your backswing compact, you can hit the ball in the sweet spot more consistently. A solid, center-face hit with a three-quarter swing will go further and straighter than a mis-hit with a full, violent swing.
To make these adjustments easier, you should work on your overall body mobility between rounds. Improved hip and ankle flexibility will reduce the demands on your knees. When your hips can turn, your knees do not have to twist. This is the secret to a long, pain-free golf career.
To master these technical changes, practice them in slow motion at home. Stand in front of a mirror without a club. Practice flaring your feet, lifting your lead heel, and stepping through your finish. Focus entirely on the feel of your hips rotating. You should feel a sense of ease and fluid movement in your lower body. If you feel any tension or pain in your knees, adjust your foot position or shorten your turn.
To prepare your body for the golf course, you must practice specific movements at home. These drills are designed to build muscle memory and joint stability. They focus on eccentric control and frontal-plane stability. This means they teach your muscles to control deceleration and resist lateral movement. Perform these exercises daily to protect your new joint.
These drills should be a part of your regular injury prevention routine. They target the specific physical pathways used in the golf swing. By mastering these movements at home, you protect your knee from sudden forces on the course.
Many golfers bend their knees too much at setup. This creates a squatting posture that places high compressive forces on the kneecap. The hip hinge teaches you to bend from your hips, keeping your spine straight. This allows you to reach the ball without overloading your knees.
When doing the hip hinge, imagine you are holding a bowl of water in your pelvis. As you hinge forward, imagine tipping the bowl forward to pour the water out. This visual cue helps you rotate your pelvis correctly, keeping your lower back flat and your knees safe. Do not let your knees bend forward past your toes. Keep your weight centered in your arches.
This exercise is vital for golfers who have had a lead knee replacement. It helps build the strength required to post up on your lead leg during the follow-through. It also improves your overall balance.
When performing the single-leg stability drill, you can use a mirror to check your alignment. Your knee should never cave inward. This inward movement is a sign of weak hip abductors, specifically the gluteus medius. If your gluteus medius is weak, your knee will collapse inward during the golf swing, putting high lateral stress on the prosthesis. If you struggle with balance, you can lightly touch a wall or a golf club with one hand for support. As your balance improves, try to perform the drill without any assistance.
This drill helps you manage your weight transfer during the swing. It prevents your lead foot from rolling outward, which can cause your knee to slide. Proper weight transfer keeps the knee joint stable.
The sensation of pressing down on the half-ball is key. It should feel like you are squishing a bug under your big toe. This pressing action activates the inner thigh muscles and the deep glutes. These muscles are responsible for stabilizing your pelvis and protecting your knee from sliding laterally. Practice this movement ten times before each round of golf to prime your muscles.
This drill helps you develop a smooth, natural rhythm. It coordinates your weight shift with your arm movement, preventing sudden, jarring forces on your knees.
For the step-and-swing drill, focus on tempo. The step should be soft and quiet. If you hear a loud stomp when your foot lands, you are stepping too hard. This jarring impact sends stress directly into your knee joint. The step should feel like a gentle walk. This drill is excellent for building transition rhythm, which is the key to effortless power.
Returning to golf after a total knee replacement is exciting. However, many golfers make critical mistakes that delay their recovery or damage their new joint. By recognizing these pitfalls, you can avoid setbacks and keep your progress on track.
The first major pitfall is rushing the walk. A round of golf is a massive physical challenge. Walking 18 holes means taking over 10,000 steps on uneven, sloping turf. Many golfers assume that because they can swing a club without pain, they can walk the course. This is a mistake. Before you try to walk 18 holes of golf, you must walk that same distance off the course. Walk five miles around your neighborhood or on a flat track first. If you can do this without pain or swelling, you are ready to walk the course.
The second pitfall is adopting the jockey position at setup. This occurs when a golfer bends their knees excessively, creating a deep squat. Golfers often do this because they feel unstable on their new knee. However, this deep bend increases the compression forces on your prosthetic kneecap. It makes it harder to rotate your hips, forcing your knees to twist instead. Keep your knees slightly bent and focus on bending from your hips.
At setup, some golfers bend their knees excessively to get closer to the ball. This is often combined with a rounded lower back. This posture is called the jockey position because it looks like a horse jockey. This deep knee bend places a high load on the patella and the patellofemoral joint. When you swing from this position, your knees must work incredibly hard to stabilize your body. This can cause pain in the front of your knee. To fix this, stand tall, soft-bend your knees, and hinge from your hips until your hands hang naturally.
The third pitfall is ignoring joint swelling. Swelling is your body's warning system. It indicates that the tissues around your new knee are under too much stress. If your knee swells after a practice session, you must stop. Rest, ice, and elevate the leg until the swelling goes down completely. Do not try to play through the swelling. Doing so can lead to chronic inflammation or loosen the implant over time.
The fourth pitfall is playing consecutive days too early. Your knee needs time to recover and adapt to the stress of play. In our experience, you should space your rounds out in the beginning. Play once every three or four days. This allows your joint and supporting muscles to recover fully before you load them again.
When you first return to golf, you will be tempted to play as much as possible. However, your knee needs time to recover between rounds. Playing back-to-back days can lead to cumulative fatigue and swelling. Your muscles will be tired, and they will not be able to support your knee joint properly. This increases the risk of injury. Space your rounds out in the beginning. Play once every three or four days. This allows your joint and muscles to rest and adapt.
How you practice is just as important as how you swing. Many golfers make the mistake of going to the driving range and hitting hundreds of balls without a plan. This repetitive stress is highly damaging to a recovering knee. To protect your joint and improve your game, you must adopt smarter practice strategies.
We highly recommend using a structured practice routine. Instead of hitting fifty seven-irons in a row, change your club and target after every single shot. This random practice simulates the actual demands of a round of golf. It prevents repetitive stress on your joints because you are constantly changing your posture, setup, and swing speed. It also improves your learning retention, making you a better golfer on the course.
Another vital strategy is the one-to-one practice ratio. For every full swing you make at the range, spend one minute resting or practicing your short game. This ratio keeps your joint from swelling. Hit a ball, then walk away, check your alignment, or practice a gentle hip hinge stretch. This slow pace keeps your muscles fresh and prevents the fatigue that leads to poor swing mechanics and joint stress.
Finally, practice on natural grass whenever possible. Artificial range mats are often laid over concrete bases. These hard surfaces do not absorb shock well. When your club strikes a hard mat, the impact force is sent directly up your shaft and into your joints. Natural turf is much softer and absorbs a significant portion of this impact, protecting your knee from harmful vibrations.
Your golf equipment plays a major role in how much stress is transferred to your knees. Standard golf gear is often designed for maximum distance and stiffness. For a golfer with a replaced joint, this rigidity can cause issues. Making small changes to your gear can protect your body from harmful vibrations.
Let's check your shafts first. Steel shafts are very heavy and rigid. When you strike the ball, the impact shock travels up the shaft and into your body. This shock can cause joint pain in your knees, hips, and back. We highly recommend switching to high-quality graphite shafts. Graphite is a natural shock absorber. It cushions the impact of the ball, protecting your joints from painful vibrations.
Modern graphite shafts are not just for slow swing speeds. They are used by many top professional players because of their consistency and feel. Graphite is made of carbon fibers that naturally dampen vibrations. In contrast, steel is a highly efficient conductor of shock. If you switch to graphite, you will notice that your joints feel much fresher after a round of golf. Your hands and arms will also feel less fatigued.
If you do not want to replace your steel shafts, you can use vibration-dampening inserts. These are small tubes made of specialized materials that slide inside your metal shafts. Products like ProSoft or Vibra-Dampener inserts are inexpensive and highly effective. They absorb the high-frequency vibrations before they reach your hands and travel through your body.
Your choice of footwear is also incredibly important. Traditional golf shoes with heavy metal spikes lock your feet into the ground. While this provides great grip, it forces your knees to twist during the swing. Instead, choose spikeless golf shoes with a flexible, rubber sole. These shoes allow your feet to naturally roll and twist slightly during your swing, which relieves pressure on your knees. Avoid shoes with large, aggressive spikes that bite too deeply into the turf.
Proper gear selection is just as important as your post-round recovery habits. Using the right equipment reduces the cumulative stress placed on your body. This allows you to practice longer and play more frequently without pain.
You might not think that your hand grip can affect your knees, but it does. When your grips are too small or worn out, you tend to squeeze the club tightly. This tight grip creates tension in your forearms, which travels up to your shoulders and down through your torso into your legs. This overall body tension makes you rigid. When you hit the ball, a rigid body cannot absorb shock, forcing your joints to take the impact.
Switching to midsize or jumbo grips can help you relax your hands. These larger grips require less finger pressure to hold the club securely. This allows your wrists and arms to remain loose and fluid. A relaxed body is a natural shock absorber. It cushions the impact of the ball, protecting your new knee from painful vibrations.
Let's also discuss clubhead design. Game-improvement irons with large, hollow cavities are much more forgiving than blade-style irons. They are designed to absorb vibration and distribute the force of off-center hits. If you hit a ball off the toe of a blade iron, the resulting shock is severe and painful. A game-improvement iron cushions this shock, protecting your hands and joints from sudden vibrations. Consider switching to more forgiving irons to protect your body.
Your recovery does not stop when you leave the golf course. The way you move during your daily life has a direct impact on how well your knee performs during your swing. If you practice poor movement habits at home, your golf game will suffer. You must learn to maintain proper knee alignment during everyday activities.
One of the most common daily errors is knock-knees, which is also known as valgus collapse. This happens when your knees cave inward toward each other. It commonly occurs when you stand up from a chair or walk up stairs. This inward movement places extreme stress on the ligaments surrounding your new joint. To prevent this, always make sure your knees track directly over your second toe. When standing up, push your knees slightly outward.
How you sit can affect your knee recovery. Avoid sitting in low, deep sofas where your knees are bent at an acute angle. This deep flexion can compress the joint and restrict blood flow, leading to stiffness. Instead, sit in firm chairs where your hips are slightly higher than your knees. This position reduces the pressure on your kneecap and makes it easier to stand up.
When standing up from a chair, do not use your hands to push off if you can avoid it. Instead, use your leg and glute strength. Keep your feet flat on the floor, shoulder-width apart. As you stand, focus on keeping your knees aligned with your toes. Do not let them cave inward. This simple daily movement is a great way to build functional strength and practice proper joint tracking.
Another common habit is standing with all of your weight shifted onto one leg. Many people do this while waiting in line or talking to friends. If you constantly shift your weight to your operated leg, you place a continuous, uneven load on the joint. This can cause the surrounding muscles to become tight and fatigued. Practice standing with your weight distributed evenly between both feet.
Finally, pay close attention to how you climb and descend stairs. There is a simple rule used by physical therapists: "up with the good, down with the bad." This means when you are walking up stairs, you should lead with your non-operated leg. When you are walking down stairs, you should lead with your operated leg. This simple technique reduces the peak force placed on your new knee, allowing the tissues to heal properly.
Many post-surgery golfers walk with a slight limp, even after they have healed. This is often a mental habit rather than a physical limitation. They are protecting the knee out of fear of pain. Walking with a limp causes your hips and lower back to become misaligned. This misalignment will eventually lead to pain in other areas of your body. Practice walking with a smooth, even stride. Focus on rolling from your heel to your toe on each step, and extend your knee fully.
To protect your new knee joint, you must build strong muscles around it. Your prosthetic knee relies on your muscles for stability and support. If your leg muscles are weak, your joint will experience more wear and tear. Focus on building strength in your glutes, hamstrings, and core.
Your glutes are the powerhouse of your golf swing. They are responsible for rotating your hips and generating power. When your glutes are strong, they take the pressure off your knees. Practice simple bodyweight squats. Stand with your feet shoulder-width apart, flare your toes, and lower your hips as if sitting in a chair. Squeeze your glutes as you stand back up.
The hamstrings are also critical for knee stability. They act as a brakes system, controlling deceleration during your swing. You can strengthen your hamstrings with glute bridges. Lie on your back with your knees bent and feet flat on the floor. Lift your hips until your body forms a straight line from your shoulders to your knees. Hold this position for three seconds, then lower your hips slowly.
Finally, do not neglect your core muscles. A strong core connects your upper body to your lower body, allowing for a smooth transfer of energy. If your core is weak, your swing will be jerky and unstable. This instability can cause your knees to twist violently at impact. Practice simple forearm planks to build core endurance. Hold the plank position for thirty seconds, keeping your body in a straight line.
Developing a dedicated strength routine will extend your playing years. Strong muscles act as natural shock absorbers for your joints. They protect your prosthetic knee from the high forces of the golf swing, ensuring you can play for decades to come.
Your hips are the primary rotators of your body. If your hips are weak or tight, your body will try to find rotation elsewhere. It will force your lower back and knees to twist. Since your knees are hinge joints, they cannot handle this twisting force. Therefore, building hip strength is the absolute best way to protect your knees.
To strengthen your hips, focus on the gluteus medius. This muscle is located on the side of your hip. It is responsible for stabilizing your pelvis when you stand on one leg. You can strengthen it with side-lying clamshells. Lie on your side with your knees bent at 90 degrees. Keep your feet together and slowly lift your top knee as high as you can without tilting your pelvis. Lower it slowly. Perform three sets of fifteen repetitions on each side.
Another excellent exercise is the wall sit. Wall sits build isometric strength in your quadriceps and glutes. Stand with your back against a wall. Slide your back down the wall until your knees are bent at a comfortable angle, no more than 90 degrees. Hold this position for twenty to thirty seconds. Make sure your knees are tracking over your toes. This exercise builds endurance in the thigh muscles, which helps keep your knee stable during the back nine.
Many golfers do not realize that knee pain is often a hip problem. The knee is a simple hinge joint that only wants to bend forward and backward. It does not like to twist. The hip joint, however, is a ball-and-socket joint designed for deep rotation. If your hips are tight, your body will force your knees to twist to complete your swing.
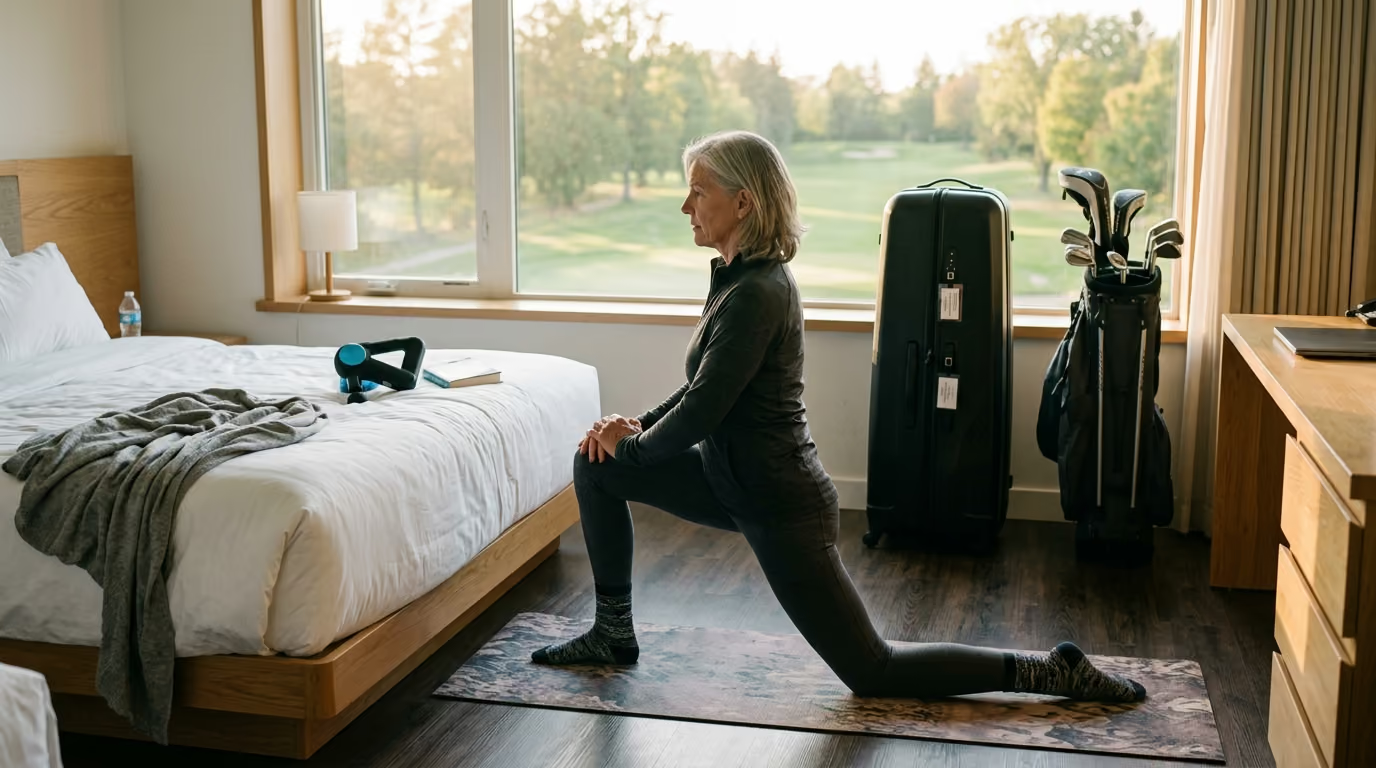
To protect your knee, you must improve your hip rotation. One of the best exercises for this is the seated 90-90 stretch. Sit on the floor with your right leg bent at 90 degrees in front of you. Bend your left leg at 90 degrees behind you. Keep your torso tall and gently lean forward over your front leg. Hold this stretch for thirty seconds, then switch sides. This stretch targets the deep hip rotators, opening up your pelvis for a smoother swing.
Another excellent movement is the standing hip rotation. Stand next to a wall or table for balance. Lift your trail leg and bend your knee to 90 degrees. Slowly draw a circle with your knee, moving your hip through its full range of motion. Perform ten circles outward, then ten circles inward. This movement lubricates the hip joint and prepares it for the rotational demands of your swing.
By freeing up your hips, you create a buffer for your knees. Your hips will handle the rotation of your swing, allowing your knees to stay stable. This simple shift in mobility will protect your prosthesis and increase your swing speed.
Even with a perfect swing, your new knee will experience some stress during a round of golf. Managing this stress immediately after you play is critical. Proper recovery habits prevent minor inflammation from turning into chronic joint pain.
The first step of post-round recovery is active cooling. Apply ice to your knee for fifteen to twenty minutes immediately after your round. Do not place ice directly on your skin, use a thin towel to protect it. Ice constricts blood vessels, which reduces swelling and calms irritated nerves. This is especially important during the first year after your surgery.
The second step is joint elevation. Lie down on a sofa or bed and prop your foot up on a few pillows. Your ankle should be positioned higher than your heart. This allows gravity to help drain excess fluid away from your knee joint. Elevation is a highly effective way to reduce throbbing and stiffness after walking several miles.
Finally, stay hydrated and eat a balanced meal after you play. Your body needs water and nutrients to repair the tissues that were stressed during your round. Avoid inflammatory foods like sugar and processed meats. Instead, choose anti-inflammatory foods like berries, fish, and green vegetables. These foods help your body recover faster, ensuring you are ready for your next round.
Fear of re-injury is a major barrier for many golfers. When you stand over the ball for the first time after surgery, you may feel anxious. You might worry that a fast swing will damage your new knee. This fear is completely normal, but it can cause your body to become tense. Tension ruins your swing tempo and makes you more prone to injury.
To overcome this fear, start slowly. Focus on the drills in this manual. When you practice, do not focus on where the ball goes. Focus entirely on the feel of your movement. If you feel any sharp pain, stop immediately. If you only feel a gentle stretch or muscle fatigue, that is normal. Trust your body and your rehabilitation.
By taking a patient, systematic approach to your recovery, you can return to the game you love without pain. Focus entirely on turning your trail hip, protect your joint from sudden twists, and enjoy many more years on the course.
Expert Takeaway: Rebuilding your swing to protect your new knee is not a compromise, it is an opportunity to develop a more efficient, pain-free motion that will extend your playing years.
Follow Golfergy for practical insights on performance, mobility, recovery and healthy ageing. Stay connected for new articles, research-led guidance and ideas to help you play better for longer.


Explore practical resources on performance, recovery, mobility and golf longevity.
Read the Blog