Learn how to perform a self-screening protocol to identify and address physical limitations, helping golfers over 50 maintain their game and prevent injuries.




Most golfers over fifty think the path to a longer swing is more stretching. They buy foam rollers, pull on resistance bands, and spend hours bending their backs. This approach often leads directly to the doctor's office. Stretching a joint that lacks stability is a recipe for injury.
Our bodies do not need endless flexibility to swing a golf club safely. They need a systematic check of how our joints work together. An annual physical self-screening is a highly effective way to catch movement issues before they ruin your golf season. It acts like a regular maintenance check for a classic car. You would not drive a classic car hard without checking the fluids and alignment.
The saddest thing I have seen in golf is watching lifelong playing partners slowly drop out of our weekend group. It usually starts with a nagging shoulder or knee issue they ignore until it requires surgery. That pattern is exactly why I became obsessed with golf longevity. We do not have to stop playing as we age, provided we do the right maintenance work between rounds.
This guide provides a detailed screening process designed specifically for mature players. It helps you find your physical limitations so you can address them before they turn into pain.
As we cross the age of fifty, our bodies undergo predictable physical changes. These changes directly impact the golf swing. Understanding the biomechanics of these changes is the first step toward protecting your body.
The foundation of golf movement is the Joint-by-Joint philosophy. This concept states that the human body operates as a stack of alternating mobile and stable joints. Your ankles must be mobile, while your knees must be stable. Your hips must be mobile, while your lower back must be stable. Your thoracic spine, which is your middle back, must be mobile, while your shoulder blades must be stable.
When a mobile joint loses its ability to move, the nearest stable joint is forced to move instead. For the over-50 golfer, this is where trouble begins. If your hips lose their rotational mobility, your lower back must twist to complete your backswing. Your lower back is not built for rotation. It is designed for stability.
This compensation leads directly to wear, tear, and injury. Research shows that golfers over age 50 have a 65 percent injury rate. This is significantly higher than the 58 percent rate seen in younger players.
The lower back is the most common site of trouble. It accounts for 25 percent of all golf-related injuries. This pain is rarely a lower back problem. It is almost always a hip or thoracic spine problem.
According to the British Journal of Sports Medicine, male athletes over sixty are the most common demographic to seek medical attention for golf-related injuries. This group also faces a natural decline in performance. Male golfers typically lose approximately 3 mph of clubhead speed per decade. This rate of decline often accelerates after age 60.
We can combat these changes with targeted physical checks. By measuring our movement quality, we can establish a physical handicap. Just like a golf handicap, tracking this number year-over-year shows you exactly where your body is improving or failing.
Let us look at how these physical issues appear during a round of golf. Imagine you are standing on the 14th tee box of a long par four. You have played well so far, but fatigue is starting to creep into your body. Your lower back feels slightly tight, and your shoulders feel heavy.
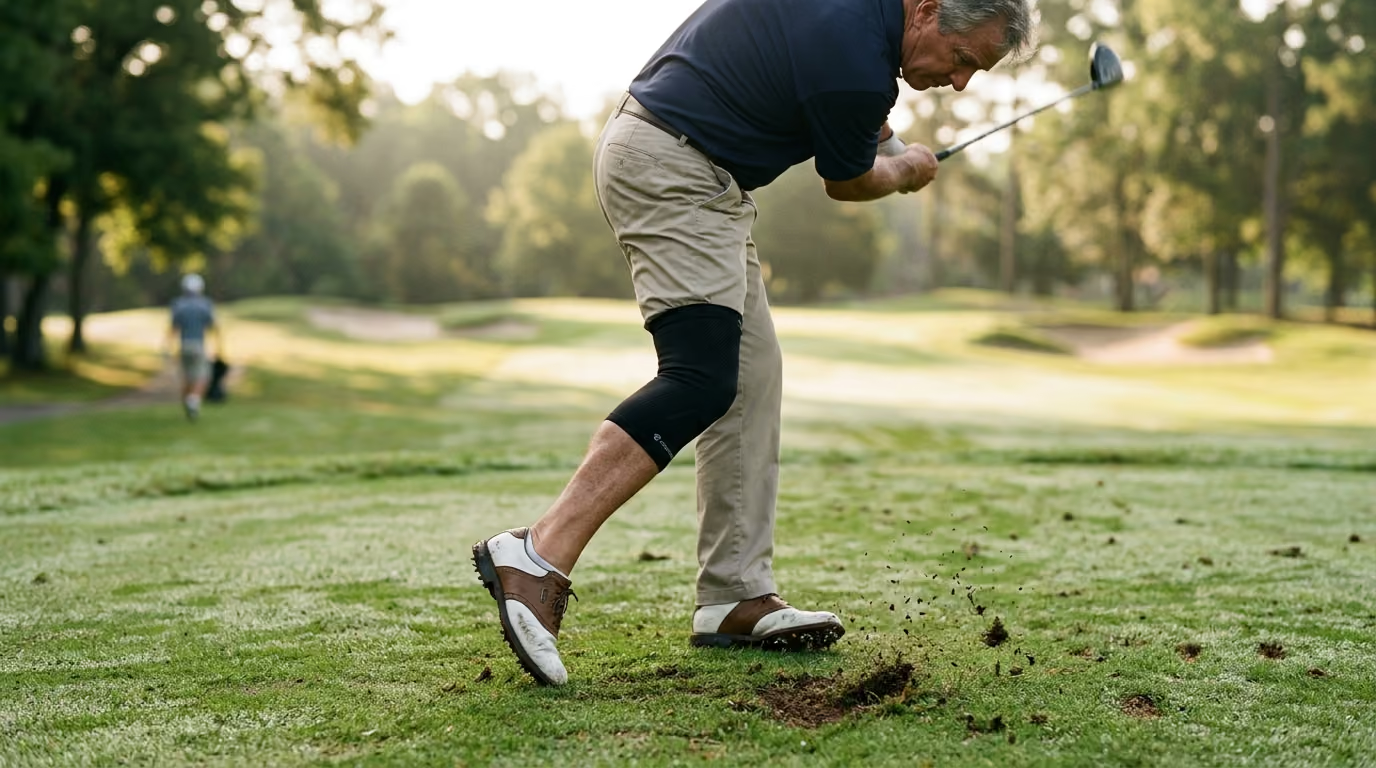
You tee up your ball and try to make a full backswing. Your trail hip feels blocked, almost like a rusty door hinge. Because your trail hip cannot rotate, your body instinctively finds another way to move. You slide your pelvis away from the target to get the club back. This slide ruins your spacing and your swing path.
During the downswing, you try to turn through the ball, but your lead hip is locked. Since your hips cannot clear, your body lifts your torso up to make room for your arms. This movement is called early extension.
Your club strikes the ball on an upward, glancing angle. You hit a weak slice that lands short and right in the rough. Even worse, the sudden upward movement puts massive shear force on your lower back. You feel a sharp pinch in your lumbar spine as you finish your follow-through.
This breakdown is not a technical swing flaw. It is a direct result of physical limitations. Your body simply chose the path of least resistance to swing the club. By understanding this body-swing connection, we can see that physical screening is a vital tool for golf injury prevention.
You can perform this comprehensive physical audit at home with minimal equipment. You will need a golf club, a chair, and a clear wall. Perform these tests once a year to track your physical changes.
This test measures the rotational mobility of your middle back. Sit tall in a chair with your knees and feet pinned together. Place a golf club across your collarbones and hold it with crossed arms.
Without moving your knees or feet, turn your shoulders as far to the right as possible. Hold the position and measure the angle of the club relative to your starting position. Repeat the movement to the left.
A passing score is 45 degrees of rotation in both directions. If you cannot reach this angle, your thoracic spine is restricted. This limitation will limit your backswing and force your lower back to twist.
This test determines if your limitation is in your lower back or your hips and hamstrings. Stand with your feet completely together and your toes pointing straight ahead. Keep your knees locked straight.
Bend forward at the waist and try to touch your toes with your fingertips. Pay attention to where you feel the tension. Note if your knees try to bend to help you reach farther.
You pass if you can touch your toes without bending your knees. If you cannot touch your toes, you have a mobility restriction. If you feel the tension mostly in your calves and hamstrings, your hips are tight. If you feel it in your back, your spine is restricted. This test is a cornerstone of healthy ageing for golfers.
This test measures your shoulder external rotation. Stand tall with your feet shoulder-width apart. Raise your lead arm out to the side so it is level with your shoulder. Bend your elbow to a 90-degree angle, with your fingers pointing toward the ground.
Without moving your shoulder blade, rotate your forearm upward and backward as far as possible. Your palm should face forward, and then lean backward. Repeat this test on your trail arm.
You pass if your forearm can tilt backward past 90 degrees, matching your spine angle. If your arm stops before reaching this angle, your shoulders are tight. This restriction causes a shortened backswing or a flying trail elbow.
This test evaluates your pelvic control and your ability to separate your upper body from your lower body. Stand in your normal golf posture with your arms crossed over your chest. Try to tilt your pelvis forward, arching your lower back. Then, tilt your pelvis backward, flattening your lower back.
Once you check your tilt, try to rotate your hips left and right. Keep your shoulders completely still while you do this. Your upper body should not move at all.
You pass if you can perform both movements smoothly without shaking. If your upper body moves when you try to tilt or rotate your pelvis, you lack pelvic control. This makes it very difficult to start your downswing with your lower body.
This test checks the strength and endurance of your glute muscles. Lie on your back on the floor with your knees bent and feet flat. Lift your hips into the air until your body forms a straight line from your knees to your shoulders.
Hold this bridge position. Slowly extend your right leg straight out into the air, keeping your knees level. Hold for ten seconds, then repeat with your left leg.
You pass if you can hold your hips level for ten seconds on each side. If your hips sag, drop, or cramp, your glutes are weak. This is often called glute amnesia, and it is very common in players who sit for long periods.
This test evaluates your balance and ankle stability, which naturally decline after age fifty. Stand tall with your feet together. Lift one foot off the ground and hold your balance. Once you are stable, close your eyes.
Measure how long you can hold this position before your foot touches the ground. Repeat the test on your other foot.
You pass if you can hold your balance with eyes closed for 10 to 25 seconds per leg. Balance is vital for proper weight transfer. If you fail this test, you will struggle to post up on your lead leg during the downswing.
This test checks the overall coordination of your body. Hold a golf club overhead with your arms straight. Your hands should be slightly wider than shoulder-width apart.
Keep your feet shoulder-width apart and point your toes straight ahead. Squat down as low as possible without letting your heels lift off the ground. Keep the golf club pressed overhead throughout the movement.
You pass if you can lower your thighs parallel to the ground while keeping the club over your feet. Your heels must stay flat on the floor. Failing this test indicates tight hips, tight calves, or a stiff thoracic spine.
If your annual audit reveals movement blocks, you must address the root cause. Do not just stretch your muscles. You must build strength to stabilize your joints. Focus on one small movement at a time to build a sustainable routine.
This exercise targets rotational hip mobility and glute strength. Stand near a wall for balance. Lift your lead foot slightly off the ground.
Focus entirely on turning your trail hip away from your lead side. Do not let your trail knee collapse inward. Squeeze your trail glute at the end of the movement to lock in the turn. Perform ten repetitions on each side.
This movement trains your hips to rotate without sliding. It protects your lower back by keeping the rotation in the hip joint.
This exercise cures glute amnesia and strengthens your core. Lie on your back on a soft mat with your knees bent. Place your arms flat on the floor beside you.
Focus entirely on squeezing your glutes as you lift your hips. Once your hips are raised, slowly lift your right foot off the floor. Lower it down and lift your left foot.
Keep your hips perfectly level as you march. Perform this movement for one minute. This exercise builds the pelvic stability needed to hold your golf posture.
This exercise improves the mobility of your middle back. Lie on your side on the floor with your knees bent at 90 degrees. Extend both arms straight out in front of you, touching your palms together.
Keep your knees pinned together on the floor. Focus entirely on turning your ribcage toward the ceiling as you swing your top arm open. Follow your hand with your eyes.
Hold the open position for two deep breaths. Return to the start and repeat ten times on each side. This movement directly improves your ability to make a full shoulder turn.
You cannot fix structural physical issues during a round of golf. However, you can use a quick routine on the tee box to protect your joints and improve your movement.
First, adjust your foot position. If your hips are stiff, flare your feet outward. Flare your lead foot out by 20 to 30 degrees. Flare your trail foot out by 10 to 15 degrees.
This simple adjustment instantly reduces the amount of rotation required from your hip joints. It opens up your pelvis and makes it much easier to turn through the ball. This is a highly effective on-course tool for players with limited rotational mobility.
Next, run through a quick dynamic warm-up. Cold joints and muscles do not handle rotational torque well. Do not perform static stretches before you play, as this can temporarily decrease muscle power.
This routine prepares your nervous system for the swing. It lubricates your joints with fluid and raises your core temperature.
When golfers over fifty try to improve their fitness, they often make mistakes that lead to injury. Avoid these common pitfalls to stay healthy.
Many senior players focus entirely on stretching. They spend hours trying to get more flexible. Stretching without building strength creates unstable joints.
If you increase your range of motion, you must build the strength to control that new range. Without stability, your joints are vulnerable to injury during the high-speed movements of the swing. Balance your mobility work with strength training.
Older golfers often prefer two-legged exercises because they feel safer. Exercises like standard squats and leg presses are great, but golf is a single-leg sport.
During the downswing, almost all of your weight transfers to your lead leg. If you do not train your balance on one leg, your lead knee and hip will lack stability. Include single-leg exercises in your weekly routine.
Many golfers work hard on their fitness during the winter. Once the spring arrives, they stop training completely to play more golf.
Physical gains fade quickly when you stop training. By mid-summer, your strength and mobility will decline. This sudden drop in physical capacity is why many players suffer back pain in July and August. Maintain a light strength routine throughout the playing season.
Do not try to lift the weights you used in your thirties. Using too much weight too soon puts excessive stress on your joints and tendons.
Focus on perfect form and controlled movements. Use lighter weights with higher repetitions to build strength safely. Your joints will thank you, and you will recover much faster between workouts.
Do not walk straight from your car to the first tee. Swinging a club with cold joints is the easiest way to pull a muscle or strain your back.
Dedicate eight minutes to a dynamic warm-up before every round. If you are short on time, cut your range session short to make sure you warm up your body first.
Your physical limitations should dictate the equipment you use. The wrong gear can force your body into awkward positions, increasing your risk of injury.
If you suffer from arthritis or stiff fingers, standard-sized grips can be painful. This pain forces you to squeeze the club too tightly.
Squeezing too hard locks up your wrists and forearms. This tension travels up your arms and restricts your shoulder movement. Switching to midsize or jumbo grips can reduce your grip pressure and protect your wrists.
Using shafts that are too stiff or too heavy is a common mistake. If your swing speed is declining, a stiff shaft forces you to swing harder to launch the ball.
This extra effort strains your muscles and joints. Switching to regular or senior-flex shafts allows the club to do the work. This change protects your joints and helps you maintain your clubhead speed without extra physical effort.
Your golf shoes play a vital role in joint protection. If you have stiff knees or ankles, highly structured shoes with heavy spikes can lock your feet to the ground.
This lock increases the rotational stress on your knees and hips. Spikeless shoes allow for a slight amount of foot slide during the swing. This slide acts as a safety valve for your joints.
Many golfers over fifty have undergone total hip or knee replacements. The good news is that golf is highly compatible with joint arthroplasty.
Studies show that 99 percent of orthopedic surgeons permit their patients to return to golf after a joint replacement. There are no significant reports of prosthesis loosening caused by the golf swing.
However, you must adapt your movement to protect your new joint. Do not try to swing with the same mechanics you used before surgery.
If you have a total hip replacement on your lead side, make sure to flare your lead foot outward. This flare reduces the twisting force on your new hip as you rotate through the ball.
Keep your backswing slightly shorter to avoid over-twisting. Focus on a smooth, balanced finish rather than trying to power through the ball.
Run through your annual self-screening protocol to find your new baseline of movement. Use these tests to guide your recovery and keep your joint safe.
Test your physical movement every year, prioritize joint stability over raw power, and adjust your mechanics to keep playing the game pain-free. If you want to learn more about keeping your swing strong, visit our golf longevity programs for more tips and exercises.
Follow Golfergy for practical insights on performance, mobility, recovery and healthy ageing. Stay connected for new articles, research-led guidance and ideas to help you play better for longer.


Explore practical resources on performance, recovery, mobility and golf longevity.
Read the Blog