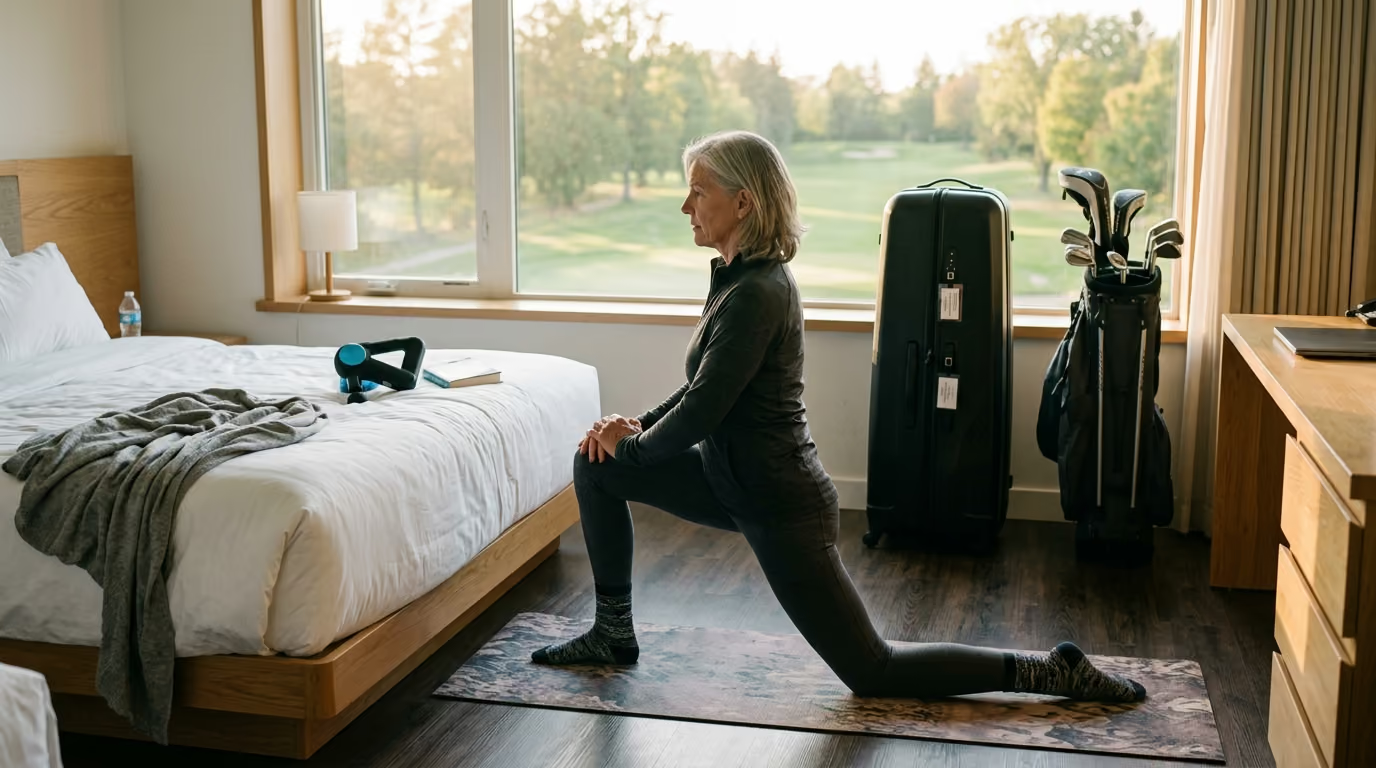

Learn how to manage sciatica and nerve pain on the golf course with practical strategies and adjustments to keep you playing the game you love.




You stand on the eighth tee box with your driver in hand. The wind is perfect. You feel ready to hit a long drive down the fairway. You take your stance, bring the club back, and start your downswing.
Suddenly, a sharp pain shoots down your trail leg. It starts in your lower back and travels down to your calf. Your knee gives out slightly. You drop your club in frustration.
This is not normal muscle soreness. This is sciatica. This condition stops many experienced golfers from playing. It can turn an enjoyable afternoon into a struggle.
Fortunately, you can learn to manage this pain. With the right adjustments, you can keep playing golf for many years. Many golfers over forty experience this frustrating issue. It often happens because the golf swing puts unique stresses on the body.
Understanding these stresses is the first step to finding relief. You do not have to give up the game you love. This manual will show you how to protect your spine. It offers practical steps to keep you moving well.
To manage this issue, you must understand how your spine works during a swing. The sciatic nerve starts in your lower back. It is made of several nerve roots from the lumbar spine. These roots join together to form one thick nerve.
This nerve runs through your pelvis and down your leg. In a golf swing, your spine moves in multiple directions at once. It bends, tilts, and rotates. This combination of movements can put pressure on your spinal discs.
Repetitive Traumatic Discopathy is a term for wear and tear on these discs. It is caused by repetitive twisting of the lower back. The discs act as shock absorbers between your vertebrae. When they are squeezed and twisted repeatedly, they can bulge outward.
A bulging disc can press directly against the sciatic nerve. This pressure causes the pain and numbness you feel in your leg. The twist of the swing makes this pinch worse.
The modern golf swing is often the main cause of this stress. This swing style focuses on the X-Factor. This is the difference between your shoulder turn and your hip turn. To get a high X-Factor, golfers keep their hips still.
They rotate their shoulders as far as possible. This creates a twisting force in the lower back. The lumbar spine is not built for this type of rotation. It only has about twelve degrees of rotational movement.
Forcing it to turn further leads to disc damage. This damage is a primary cause of nerve pain. Classic swings avoid this issue by moving the hips and shoulders together.
The lead hip is another critical factor in this process. During the downswing, your lead hip must rotate inward rapidly. This rotation allows your body to clear out of the way. If your lead hip is stiff, your body must adapt.
It forces your lower back to twist to complete the swing. This compensation puts immense pressure on your sacroiliac joint. This joint sits right next to the sciatic nerve. Stiff hips are a major cause of lower back pain in golfers.
Protecting this area requires a swing that respects your natural anatomy. You can find more about this in our golf performance articles. These guides explain how to move without damaging your joints.
At home, you can test your pelvic control. Stand in your golf posture with your arms crossed over your chest. Try to tilt your pelvis forward and backward without moving your upper body. If you cannot do this smoothly, your lower back is likely taking too much strain during your swing.
The Titleist Performance Institute uses this pelvic tilt test to identify golfers at risk for back pain. When your pelvis is locked, your lower back must overcompensate. This overcompensation leads to nerve irritation over time.
A landmark study by Hosea and Gatt in 1996 measured the forces on the spine during a golf swing. They found that the shear forces on the lumbar spine are up to eight times body weight. This is similar to the forces experienced by college football players. For mature golfers, these high forces can quickly cause damage. This is why maintaining proper swing mechanics is so critical.
Lower back injuries are the most common physical issue in golf. Research shows they affect up to thirty-four percent of amateur players. Professional golfers face an even higher risk. Studies indicate that up to seventy-three percent of professionals experience lower back pain during their careers.
For amateurs, the lifetime rate is about fifty-six percent. These numbers show that golf puts a high demand on the spine. It is not a low impact sport for your back.
Clinical studies show a direct link between hip movement and back pain. Golfers with limited lead hip rotation suffer from more back issues. The lumbar spine must work twice as hard when the hips are stiff. This extra work leads to disc wear and nerve irritation.
Nerve irritation does more than cause pain. It also alters your movement patterns. When you feel even mild sciatica, your brain tries to protect your body. It shuts down certain muscles and recruits others to bypass the pain.
This muscle inhibition disrupts your kinematic sequence. Your body stops firing muscles in the correct order. Even after the pain fades, these bad movement patterns can remain. This leaves you vulnerable to more injuries.
Incorporating targeted injury prevention strategies helps restore proper muscle function. It teaches your body to move safely again.
When the sciatic nerve is compressed, the body tries to avoid the painful position. This changes how you transfer energy from the ground up. In a healthy swing, the energy starts in your feet, moves to your hips, then to your torso, and finally to your arms. This is the kinematic sequence.
Nerve pain breaks this sequence. Because your hip muscles are inhibited, you cannot push off the ground effectively. You must rely on your upper body to pull the club through. This swing path is not only inefficient but also dangerous. It puts a heavy load on your shoulder joints and lower back.
Nerve pain does more than cause temporary discomfort. It actually changes how your muscles work. When the sciatic nerve is irritated, your brain receives warning signals. To protect you, your brain alters your movement patterns.
It shuts down certain muscles to avoid further irritation. This process is called muscle inhibition. The gluteus medius is often the first muscle to shut down. This muscle sits on the side of your hip.
It is responsible for stabilizing your pelvis. When the gluteus medius stops working, other muscles must take over. The piriformis muscle often tries to do the extra work. This small muscle sits deep in your buttock, right over the sciatic nerve.
An overworked piriformis muscle becomes tight and inflamed. Since it sits on top of the sciatic nerve, its swelling squeezes the nerve. This creates a secondary compression point called piriformis syndrome.
Now, you have two areas pinching the same nerve. This double pinch makes your sciatica much harder to resolve. This cycle disrupts your entire swing sequence. Your body can no longer generate power from your legs.
You start using your arms and lower back to swing. This compensation leads to even more back strain. Breaking this cycle is crucial for your long term recovery. You must address the nerve irritation before you can rebuild muscle strength.
Understanding this cycle helps you see why simple rest is not always enough. You must actively retrain the inhibited muscles once the nerve pain subsides. Otherwise, the bad movement patterns will persist. This makes a return of the pain much more likely during your next round.
To break this cycle, you must first calm the irritated nerve. Only then can you begin to strengthen the surrounding muscles. This manual provides the tools to address both parts of the problem. By following these steps, you can restore your body to its proper working order.
If you feel nerve pain during a round, you need quick relief. Do not try to stretch your lower back by bending forward. Many golfers bend down to touch their toes when their back feels tight. This movement pulls the sciatic nerve tight at both ends.
It increases the tension on the nerve sheath. This can make your pain much worse on the next hole. Instead, use a standing hamstring sweep to calm the nerve. Find a step, a curb, or a golf cart bumper.
Place your lead foot on the step with your toes pointing up. Keep your knee straight but not locked. Keep your hands on your hips to support your posture. Gently tilt your head forward until you feel a very light pull in your leg.
Now, point your toes forward toward the ground. At the same time, bring your chin down to your chest. Next, pull your toes back up as you look up slightly. This movement glides the nerve back and forth.
It does not stretch the nerve. It relieves friction in the surrounding tissue. Repeat this gliding movement ten times in a slow rhythm. Do not rush or force the movement.
If you feel any sharp pain, stop immediately. This exercise can soothe the nerve while you play. It helps you finish your round with less discomfort. Use this protocol whenever you feel tightness starting to build.
Another great on-course relief movement is the standing pelvic tilt. Stand with your feet shoulder-width apart and your knees slightly bent. Rest your hands on a golf club for stability. Slowly tilt your pelvis forward, creating an arch in your lower back.
Then, tuck your tailbone under, flattening your lower back. Repeat this gentle rocking motion ten times. Focus entirely on moving your pelvis while keeping your chest quiet. This gentle movement helps release tension in the lumbar muscles. It can soothe the area around the sciatic nerve between shots.
To fix the root cause of sciatica, you need a daily routine. This routine should focus on keeping your nerves moving freely. Nerve flossing is the most effective method for this. It gently pulls the nerve from one end while releasing it at the other.
This movement helps the nerve slide through tight muscles. It reduces inflammation and improves blood flow to the nerve. The supine sciatic glide is an excellent exercise for your morning routine. Lie flat on your back on a soft mat.
Bend your unaffected knee and place your foot flat on the floor. Raise your painful leg and hold the back of your thigh with both hands. Keep your thigh perpendicular to the floor. Slowly straighten your knee until you feel a mild stretch.
Point your toes toward the ceiling. Then, bend your knee slightly while pulling your toes toward your face. Alternate between these two movements smoothly. Perform ten repetitions on each leg.
This exercise helps keep the nerve moving through your hamstrings. You can also do a seated sciatic floss during the day. Sit upright on a firm chair with your feet flat. Extend your painful leg straight out in front of you.
Flex your foot back toward your body. As you flex your foot, look up at the ceiling. Next, lower your head and tuck your chin to your chest. At the same exact time, point your toes forward and bend your knee slightly.
Move slowly between these two positions. Do not hold the stretch at either end. Perform three sets of ten repetitions daily. This keeps the nerve moving through your glutes and lower back.
Regular mobility training keeps the tissues around the nerve supple. When these muscles are loose, they do not pinch the nerve. Make these flossing exercises a regular part of your daily habits. Consistent movement is the key to long term relief.
For the standing hamstring sweep, stand facing a low step or the bumper of your golf cart. Place your target heel on the step with your toes pointing up. Keep your knee straight but not fully locked. Rest your hands on your hips to support your posture.
Gently bend forward from your hips. Keep your back completely flat. Sweep your hands down toward your foot. At the same time, tuck your chin to your chest. As you return to an upright position, look up slightly.
Repeat this sweeping motion ten times. Keep the movement slow and rhythmic. This helps mobilize the nerve pathway through your hamstrings. It is a highly effective way to start your day or prepare for a round.
You do not need to quit golf to protect your lower back. You just need to change how you swing. Modifying your swing can actually improve your consistency. The key is to adopt a classic swing style.
This style reduces rotation in your lower back. It relies on a coordinated turn of your entire body. Start with your setup. Set your feet about shoulder-width apart.
Flare both feet outward by about twenty degrees. This simple change opens up your hips. It allows your pelvis to rotate more freely. This reduces the twist required from your lower back.
Maintain a neutral pelvis at address. Do not let your lower back arch excessively. Keep your spine straight from your hips to your neck. Tilt forward from your hips, not your waist.
This position keeps your spinal joints in a safe alignment. In your backswing, let your hips turn freely. Do not try to keep your hips still to create a large shoulder turn. Allow your lead knee to move inward slightly.
This movement helps your hips rotate fully. Focus entirely on turning your trail hip. This creates a deep turn without straining your spine. Keep your backswing slightly shorter than usual.
You do not need to bring the club parallel to the ground. A three-quarter swing can produce plenty of distance. It also keeps your spine in a safe range of motion. Focus on a smooth transition into your downswing.
During the downswing, turn your body as one unit. Avoid an aggressive slide of your hips toward the target. Instead, rotate your hips and chest together. This reduces the side bend in your lower back.
Finish your swing in an upright, balanced position. Your weight should be fully on your lead leg. Your spine should be vertical and relaxed. This classic finish protects your discs from hyperextension.
Your setup determines the success of your swing. Keep your feet at shoulder-width and flare your feet outward. This flaring reduces the strain on your knees and hips. Align your hips and shoulders so they are parallel to your target line.
Avoid excessive side-bend at address. Keep your shoulders relatively level. This prevents the initial compression on your spine. As you start your backswing, let your hips turn immediately.
Do not try to restrict your hip movement. Allow your lead heel to lift slightly off the ground. This was a common feature of classic swings. Lifting the heel allows for a full hip turn. It keeps your lower back in a comfortable, neutral position.
Avoid reaching for a wide backswing. Keep your arms closer to your body to reduce leverage on your spine. Initiate the downswing with a gentle turn of your hips. Do not slide your hips laterally.
Let your weight shift smoothly onto your lead foot. Focus entirely on turning your trail hip forward. Keep your head moving naturally with your torso. Trying to keep your head perfectly still can stress your neck and back.
As you hit the ball, let your body release completely. Allow your trail foot to come off the ground. Your chest should face the target at the finish. Your spine should be tall and straight. Avoid the Reverse C posture. This classic finish keeps your back safe from heavy compression.
A proper warm-up is crucial before you tee off. It prepares your muscles and nerves for the swing. Never start swinging your driver without warming up first. Cold muscles are tight and prone to injury.
A good warm-up should take about ten minutes. Start with light walking around the parking lot. This increases your heart rate and warms up your muscles. It gets blood flowing to your spine and legs.
Walk at a moderate pace for three to five minutes. Focus on taking deep breaths as you walk. Next, perform gentle hip circles. Stand with your feet shoulder-width apart.
Place your hands on your hips for balance. Slowly rotate your hips in a circular motion. Focus entirely on turning your trail hip through its full range of motion. Do ten circles in one direction, then switch.
Keep the circles small and controlled. Do not force your hips into painful positions. This movement lubricates your hip joints. It prepares them for the rotation of your swing.
After hip circles, perform chest and hip turns with a club. Hold a golf club across your shoulders. Keep your knees slightly bent and your spine straight. Slowly turn your shoulders and hips together to the right.
Focus entirely on moving them as one unit. Then, turn them together to the left. Do not hold the turn at either end. Keep the movement smooth and continuous.
Perform fifteen turns in each direction. This exercise warms up your core and spine safely. Finish with your ankle rolls. Stand on one leg and lift your other foot.
Slowly roll your ankle in circles. Do ten rolls in each direction, then switch feet. Mobile ankles help your feet stay connected to the ground. This stability protects your knees and hips.
This warm-up prepares your nervous system for golf. It reduces the risk of sudden nerve pinches. It also helps restore your natural kinematic sequence. Make this routine a habit before every round of golf.
Golfers often make several mistakes when dealing with sciatica. These errors can prolong your recovery and cause more pain. The first major mistake is trying to push through the pain. Many players think they can walk off a flare-up.
They continue to swing hard despite feeling tingling in their legs. This approach is highly dangerous. Pain is a signal that your nerve is being compressed. Continuing to swing grinds the nerve further.
It can lead to permanent nerve damage. It also forces your body to use bad movement patterns. These patterns are very hard to unlearn later. Another common mistake is aggressive stretching of the hamstrings.
Sciatica often feels like a tight hamstring. Golfers assume they just need to stretch that muscle. They perform long, intense hamstring stretches. This pulling irritates the already inflamed sciatic nerve.
It can cause a severe flare-up of your symptoms. Many players also focus too much on core strength without hip mobility. They do endless crunches to protect their back. While a strong core is helpful, it is not enough.
If your hips are stiff, your spine will still rotate too much. You must address hip stiffness to protect your lower back. Finally, golfers often rely on pain relievers to get through a round. Taking medication before you play masks the pain.
This allows you to make swings that damage your spine. It is much better to modify your swing and rest when needed. Listen to your body to prevent long term injuries. Implementing smart injury prevention strategies will keep you on the course.
Many golfers use heating pads immediately after a flare-up. While heat feels good on sore muscles, it can increase inflammation. If your sciatica is caused by acute nerve compression, heat may worsen the swelling.
Use ice instead for the first forty-eight hours. Place an ice pack on your lower back for fifteen minutes. This helps reduce swelling and numbs the pain. Save the heat for chronic, non-inflamed muscle tightness later.
Another error is using a lumbar brace incorrectly. Some golfers wear a tight brace during their entire round. While a brace provides support, relying on it too much can weaken your muscles.
Your core muscles will stop working if the brace does all the work. Use a brace only during acute flare-ups. Focus on building natural core strength for long-term support. Avoid back extension machines at the gym. These machines force your lower back to arch under resistance. This movement can easily pinch the sciatic nerve. Stick to stable core exercises like bird-dogs instead.
Your equipment choices have a major effect on your back health. Many golfers overlook how they transport their clubs. Carrying a heavy golf bag is one of the worst things for sciatica. The weight of the bag compresses your spine.
The act of picking up the bag twists your back under load. If you must walk, use a push-cart. A push-cart allows you to walk with an upright, neutral posture. Avoid using a pull-cart.
Pulling a cart behind you forces you to rotate your torso. This repetitive, single-sided twist can irritate your sciatic nerve. Pushing a cart keeps your shoulders square and your spine straight. Using a motorized cart is a great way to save energy.
However, riding in a cart can also cause back pain. The bumps on the fairway can send shocks up your spine. To prevent this, sit upright in the seat. Do not slouch or lean to one side.
Place a small rolled-up towel behind your lower back. This supports your natural spinal curve. It acts as a shock absorber when driving over rough ground. Stand up carefully when getting out of the cart.
Do not twist your body as you step out. Your shoes can also affect your lower back. Very rigid shoes with heavy spikes can lock your feet to the turf. This prevents your ankles and knees from absorbing rotation.
This force travels straight up into your hips and lower back. Choose flexible, spikeless shoes instead. These shoes allow your feet to move naturally. They let your feet rotate slightly during the swing.
This small change reduces the rotational strain on your spine. Consider the shafts of your golf clubs. Stiff shafts require a faster, harder swing to get results. This forces you to use more muscle effort.
Switching to lighter, more flexible shafts can help. It allows you to swing with less effort. This reduces the strain on your lower back.
The weight of your golf clubs matters. Heavy steel shafts require more effort to swing. This extra effort translates to more strain on your back. Switching to lighter graphite shafts can reduce this load.
Graphite shafts also absorb more vibration from impact. This protects your hands, arms, and spine from shock. Choose a shaft flex that matches your swing speed. A shaft that is too stiff forces you to swing harder. This harder effort can trigger nerve pain.
Consider the design of your golf bag. If you use a push-cart, make sure the bag is balanced. An unbalanced bag can cause the cart to tip or pull to one side. This forces you to use extra effort to guide the cart.
Choose a bag with comfortable, padded shoulder straps. Even if you do not carry it, you must lift it from your car. Lift with your legs, not your back. Keep the bag close to your body while lifting. This protects your spine from sudden strains.
Maintaining spine health is essential for playing golf as you age. As we grow older, our spinal discs change. They lose water and become thinner. This natural process reduces their ability to absorb shocks.
It makes your spine more sensitive to heavy twisting forces. To protect your spine, you must build strength in your hips. Your glutes are the main protectors of your lower back. Strong glutes support your pelvis during your swing.
They prevent your hips from swaying or sliding. Simple exercises like glute bridges and lateral band walks are highly effective. Core stability is also crucial for spine longevity. Focus on exercises that prevent movement in your spine.
Planks and side planks build endurance in your abdominal muscles. This endurance helps keep your spine stable during the swing. It prevents the sudden, sharp twists that cause nerve pinch. You should also focus on your post-round routine.
Many golfers sit in a car for a long drive home right after playing. This is highly damaging to your lower back. Your muscles are warm and tired, and sitting compresses your discs. Instead, take a five-minute walk after your round.
This lets your spine cool down gradually. Use proper post-round recovery techniques to help your body heal. These habits will protect your joints and extend your playing years. You can read more about healthy ageing strategies on our blog.
Taking care of your body off the course is the key to playing well on it. It ensures you can enjoy the sport for decades to come. Building a strong foundation will keep you active and pain-free.
To help with this, add gentle core stability exercises to your routine. Bird-dogs are a great option. Kneel on your hands and knees with your spine straight. Slowly extend your opposite arm and leg. Hold for three seconds, then switch sides.
This exercise builds stability without putting pressure on your lower back. Consistent work off the course will yield better results during your rounds.
Revisit this field manual whenever you feel stiffness in your lower back or glutes. Do not wait for severe pain to return. Use these swing modifications and exercises to keep your spine healthy.
Before your next round, remember this core lesson: rotating your hips and shoulders together keeps your spine safe and your swing powerful.
Follow Golfergy for practical insights on performance, mobility, recovery and healthy ageing. Stay connected for new articles, research-led guidance and ideas to help you play better for longer.


Explore practical resources on performance, recovery, mobility and golf longevity.
Read the Blog