Learn how to safely return to golf after a disc herniation by understanding proper mechanics, managing pain, and building a resilient body for long-term play.




You stand on the tee box of a long par four. The wind is blowing directly against you. You reach into your bag and pull out your driver. As you bend down to push your tee into the hard turf, a sharp pinch flares in your lower back. It is not a typical muscle ache. This is a hot, radiating pain that travels down into your trail glute.
You stand up slowly, feeling your lower back lock. You hesitate to take your practice swing. This moment of fear is familiar to many golfers over forty who manage a lumbar disc herniation. Many players believe a disc injury means their golfing days are over. They worry that the twisting motion of the golf swing will cause permanent damage.
Fortunately, clinical research shows this is rarely true. Between seventy-eight and ninety-seven percent of golfers successfully return to the course after proper recovery. Managing this injury requires a shift in your approach to the game. You must move away from a power-first mindset.
You need to focus on a mechanics-and-stability framework. This playbook will guide you through a safe, structured return to full-speed rotational movement. By prioritizing physical health, you can continue playing the sport for many years.
To protect your spine, you must understand how it interacts with your swing. The lumbar spine consists of five vertebrae in your lower back. Between these bones sit spinal discs. These discs act as shock absorbers for your body.
Each disc consists of a tough outer ring and a soft, jelly-like center. A disc herniation occurs when the outer ring tears. The soft inner material then pushes outward. This bulge can press directly against nearby spinal nerves.
This pressure causes local back pain. It also causes radiating pain, numbness, or tingling down your leg. The golf swing is highly demanding on these structures. It combines three distinct movements at the same time.
These are forward bending, side bending, and rapid rotation. Research shows this combination creates significant shearing forces on the lumbar discs. Shear force occurs when one vertebra slides horizontally across another. Your lower back is not designed to rotate.
The lumbar joints only allow about fifteen degrees of total rotation. When you force your lower back to twist, you place extreme stress on the outer rings of your discs. This stress can cause the discs to bulge or tear over time.
In recent decades, golf instruction has focused heavily on the modern swing. This style encourages keeping your lead heel firmly planted on the ground during the backswing. It also encourages a wide shoulder turn while keeping your hips relatively quiet. Instructors call this separation the X-Factor.
A high X-Factor creates tremendous torque in your torso. This torque helps generate high clubhead speed. However, it also creates the maximum shearing forces your lumbar spine can face. For a golfer over forty, this mechanical stress can be highly destructive.
As we age, our spinal discs naturally lose water content. They become less flexible and more prone to tearing. Forcing a stiff, aging spine to endure high X-Factor forces is a recipe for injury.
To play golf safely with a history of disc herniation, you must change this pattern. You must learn to distribute the rotational forces of your swing across your entire body. This requires looking at how other joints contribute to your movement.
In sports biomechanics, coaches often refer to the lower back as a silent victim. This concept means your lower back rarely gets hurt because it is weak. Instead, it gets hurt because other parts of your body are not doing their jobs. Your body must rotate somewhere to swing a golf club.
If your hips and your upper back are stiff, your body will seek movement from the nearest available joint. That joint is almost always your lumbar spine. Your lower back is forced to rotate far beyond its safe limits. This compensation leads directly to disc stress and eventual herniation.
The thoracic spine is your upper and middle back. It is designed to handle rotation. Each thoracic joint can rotate several degrees, allowing for a wide, safe turn.
Your hip joints are also designed for a large range of motion. If you have poor hip mobility or a stiff upper back, your lower back must compensate. Improving the movement of these neighboring joints is the most effective way to protect your lower back. Focus on improving your rotational mobility to keep your spine safe.
If you feel your lower back tightening during a round, you need an immediate solution. Do not try to stretch your lower back by bending forward to touch your toes. This movement increases the pressure inside your discs, which can make a herniation worse.
Instead, focus entirely on turning your trail hip. When you take your stance, flare both of your feet outward by about twenty degrees. This simple adjustment opens your hip joints. It immediately reduces the amount of twisting required in your lower back during the swing.
Next, shorten your swing to a three-quarter length. Focus on a smooth, rhythmic tempo rather than trying to hit the ball with maximum power. You will still find decent distance by hitting the center of the clubface.
Finally, perform a gentle standing pelvic tilt between shots. Stand tall with your hands on your hips. Softly tuck your tailbone under, then return to a neutral position. This gentle movement helps activate your deep abdominal muscles and relieves spinal compression.
When recovering from a disc herniation, having a clear timeline is vital. Clinical studies provide valuable data on how long this process takes. The Watkins Protocol is a widely cited clinical framework for spinal recovery in athletes. This protocol emphasizes a slow transition from walking to sport-specific training.
According to clinical research, golfers who choose conservative treatment have a seventy-eight percent return-to-play rate. The average recovery time for these players is four and a half months. During this time, they focus on physical therapy, core stability, and gradual movement.
For golfers who undergo a microdiscectomy, the statistics are also highly encouraging. Research shows a return-to-play rate between eighty-five and ninety-seven percent. The average recovery time for surgical patients is between five and six months.
Recreational golfers often take longer to return than professional athletes. Professionals have access to daily therapy, which helps them return in under six months. Recreational players over forty often require eight months or longer to fully recover.
This longer timeline is normal and should not cause frustration. Most golfers who recover properly are eventually able to play the same amount of golf as before. They also return to their pre-injury club distances within twelve months.
Before you swing a club, you must know if your body is ready. The Titleist Performance Institute developed a system called the TPI Functional Screening. This system uses specific movement tests to identify physical limitations that can injure your back.
You must be able to perform these tests without any pain before you return to golf. If a test causes discomfort, your body is not ready for the forces of a swing. You should continue focusing on basic physical rehabilitation.
This test measures your ability to coordinate the movement of your hips and lower back. Stand in your normal golf posture with your arms crossed over your chest. Without moving your upper body, tilt your pelvis forward.
Then, tilt your pelvis backward by tucking your tailbone under. Your movement should be smooth and controlled. If you cannot tilt your pelvis without moving your chest, your lower back is likely locked.
This lack of control means you cannot stabilize your spine during your swing. Focus on small, controlled movements to rebuild this connection.
This test checks the flexibility of your hamstrings and the mobility of your lower back. Stand with your feet together and your knees straight. Bend forward at your hips and try to touch your toes.
You should be able to touch your toes without bending your knees or feeling sharp pain. If you cannot reach your toes, your posterior chain is too tight.
This tightness forces your lower back to bend excessively when you address the ball. Improving this flexibility is highly important for injury prevention methods on the course.
This test assesses your core stability and hip strength. Stand on one leg with your eyes open. Lift your other foot off the ground.
Hold this position for twenty-five seconds without waving your arms or losing your balance. Repeat the test on the other leg.
Balance is highly important for a stable golf swing. If you cannot balance, your body will use your lower back muscles to keep you upright. This compensation increases the load on your lumbar discs.
Recovering from a disc herniation requires a structured progression based on tissue healing. You cannot skip steps. You must build a foundation of stability before you attempt to swing a golf club. Let us examine the four distinct phases of a safe return to play.
The acute phase typically lasts from one to three weeks after an injury or flare-up. During this time, your primary goal is to calm down inflamed tissues. You must avoid movements that place direct stress on the healing disc. This means no bending, lifting, or twisting of your torso.
Your main physical activity during this phase should be walking. Walk on flat, even surfaces for fifteen to twenty minutes, twice a day. Walking promotes blood flow to the spine. It also helps pump nutrients into your discs without placing excessive load on them.
You should also begin very gentle core activation. Avoid traditional sit-ups or crunches. These movements place high compressive loads on your lumbar spine. Instead, focus on isometric exercises that keep your spine perfectly still.
The McGill Big Three exercises are ideal for this phase. These exercises build endurance in the muscles surrounding your spine. They create a natural brace that protects your lower back as you move. This is a crucial step when recovering from physical strain.
The sub-acute phase begins when your everyday pain starts to subside. This phase typically occurs between weeks four and eight. Your focus now shifts to restoring safe movement. You must build stability in your core while gently improving mobility in your hips and upper back.
Start introducing gentle pelvic tilts while lying on your back. This helps restore control over your pelvic position. A stable pelvis is highly important for a safe golf swing.
You should also focus on glute activation. Your glutes are the primary power generators in the golf swing. If your glutes are weak, your lower back will often overwork to compensate. Glute bridges are an excellent tool for this stage.
Begin working on gentle thoracic spine mobility. Use exercises that allow your upper back to rotate while keeping your lower back completely still. This teaches your brain to separate upper-body rotation from lower-body stability.
This phase usually occurs between weeks nine and twelve. At this point, you are pain-free during daily activities. Now you must prepare your body for the unique forces of the golf swing. You cannot simply jump back into full swings on the driving range.
Start with static swing holds. Take your golf posture without a club. Move slowly into your impact position and hold it for ten seconds. Then move to the top of your backswing and hold.
These static holds train your muscles to support your spine under golf-specific angles. They build isometric strength in the exact positions you will use on the course. If you can hold these positions without pain, you can progress to super-slow swings.
Use a short iron and swing at about twenty percent of your normal speed. Focus entirely on a smooth, coordinated motion. Do not hit a ball yet. Simply brush the grass with your clubhead while maintaining a stable spine.
The final phase is your transition back to the golf course. This phase requires patience and discipline. Start by practicing your short game. Spend time putting and chipping.
Putting and chipping place very low rotational loads on your spine. They allow you to get comfortable over the ball again. Once you can chip and putt without discomfort, progress to short pitch shots.
Slowly work your way up to full swings with your short irons. Start on the driving range, hitting off a natural grass surface if possible. Artificial mats can be very hard on your joints. Hit only ten to fifteen balls in your first session, then rest for forty-eight hours.
If you have no pain after two days, you can slowly increase your ball count. Gradually move up through your mid-irons, hybrids, and fairway woods. The driver should be the very last club you hit. Transition from nine holes of golf to a full eighteen holes over several weeks.
To protect your spine over the long term, you must modify your swing mechanics. These changes are designed to reduce the mechanical stress on your L4-L5 and L5-S1 discs. Many golfers find these modifications actually improve their consistency.
Many recreational golfers try to swing the club back as far as possible. They believe a longer backswing always leads to more distance. However, over-rotating at the top of your swing often causes your spine to bend laterally. This movement is called a reverse spine angle.
A reverse spine angle places extreme compressive and shear forces on your lumbar discs. By shortening your backswing to a three-quarter length, you protect your spine. You will find that your contact improves. Solid contact often makes up for any minor loss in swing speed.
Focus on stopping your backswing when your hands reach shoulder height. Keep your lead arm straight but relaxed. This shorter position keeps your spine in a much safer, more neutral alignment.
The position of your feet at address has a direct impact on your lower back. If you set up with your feet perfectly square to the target line, you limit your hip rotation. During the downswing, your lead hip must rotate internally at high speed.
If your lead hip is stiff, this internal rotation stops abruptly. The rotational force must go somewhere. It travels directly into your lower back, twisting your lumbar discs under high load.
To prevent this, flare your lead foot outward by twenty to thirty degrees. You can also flare your trail foot slightly. Flaring your lead foot pre-opens your lead hip. This change allows your pelvis to rotate freely through impact, sparing your lower back.
Lifting your lead heel during the backswing is a classic swing technique. Modern instruction discouraged this move for many years. However, it is one of the most effective ways to protect a damaged lumbar disc.
When you let your lead heel lift slightly off the ground, your hips can turn much further. This increased hip turn reduces the need for torso-hip separation. It lowers the X-Factor torque that strains your lower back.
As you start your downswing, let your lead heel plant back down. This movement naturally initiates the downswing with your lower body. It creates a smooth, flowing transition that uses your legs instead of your lower back for power.
S-Posture is a common set-up flaw where a golfer excessively arches their lower back. This posture places the lumbar spine into extension before the swing even begins. Extension combined with rotation is highly dangerous for spinal discs.
To correct this, stand tall and let your arms hang naturally. Bend forward from your hips while keeping your spine straight. Avoid sticking your tailbone out too far. Keep your abdominal muscles slightly engaged to maintain a neutral lower back.
To maintain a healthy spine, you must establish a daily routine. This routine should focus on building core endurance and maintaining mobility in your hips and upper back. Consistent practice is the key to preventing future disc issues. Here are the core strength exercises you should perform three to four times per week.
This exercise builds stability in your lower back while encouraging movement in your shoulders and hips. It targets the extensor muscles of your spine.
First, get down on your hands and knees on a soft mat. Place your hands directly under your shoulders. Place your knees directly under your hips. Keep your spine in a neutral position.
Next, extend your right arm straight forward. At the same time, extend your left leg straight backward. Do not raise your leg higher than your hip. Focus entirely on pushing your heel backward as if touching a wall.
Hold this position for eight seconds. Keep your abdominal muscles gently tightened to prevent your lower back from arching. Slowly return to the starting position. Repeat this movement on the opposite side, performing five repetitions per side.
The modified curl-up strengthens your abdominal wall without bending your lower back. This exercise avoids the high spinal compression caused by standard sit-ups.
First, lie flat on your back on a comfortable surface. Bend one knee and place that foot flat on the floor. Keep your other leg straight. This leg position helps keep your pelvis in a neutral posture.
Next, place your hands palms-down underneath your lower back. This support preserves the natural curve of your lumbar spine. Slowly lift your head and shoulders slightly off the floor.
Do not tuck your chin toward your chest. Keep your neck straight and support your head with your neck muscles. Hold this position for eight seconds, then slowly lower your head back down. Perform ten repetitions.
The side plank builds endurance in your lateral core muscles. These muscles are vital for stabilizing your spine during the rotational forces of your swing.
First, lie on your side on a mat. Prop your upper body up on your elbow. Your elbow should be directly underneath your shoulder. Bend your knees at ninety degrees.
Next, lift your hips off the floor. Keep your body in a straight line from your knees to your head. Focus on tightening the oblique muscles on the bottom side of your torso.
Hold this position for ten seconds. Maintain a steady breathing pattern. Do not hold your breath. Lower your hips back to the mat, then repeat five times before switching sides.
This mobility exercise helps open up your upper back. It helps you rotate your torso during your swing without twisting your lower back.
First, lie on your side with your knees bent at ninety degrees. Keep your knees stacked on top of each other. Extend both arms straight out in front of your chest, with your hands touching.
Next, slowly lift your top arm up and open it toward the floor behind you. Follow your hand with your eyes. Keep your knees firmly pressed together and flat on the ground.
Focus entirely on turning your upper rib cage. Do not let your pelvis twist backward. Hold the open position for three seconds, then slowly return to the start. Perform ten slow repetitions on each side.
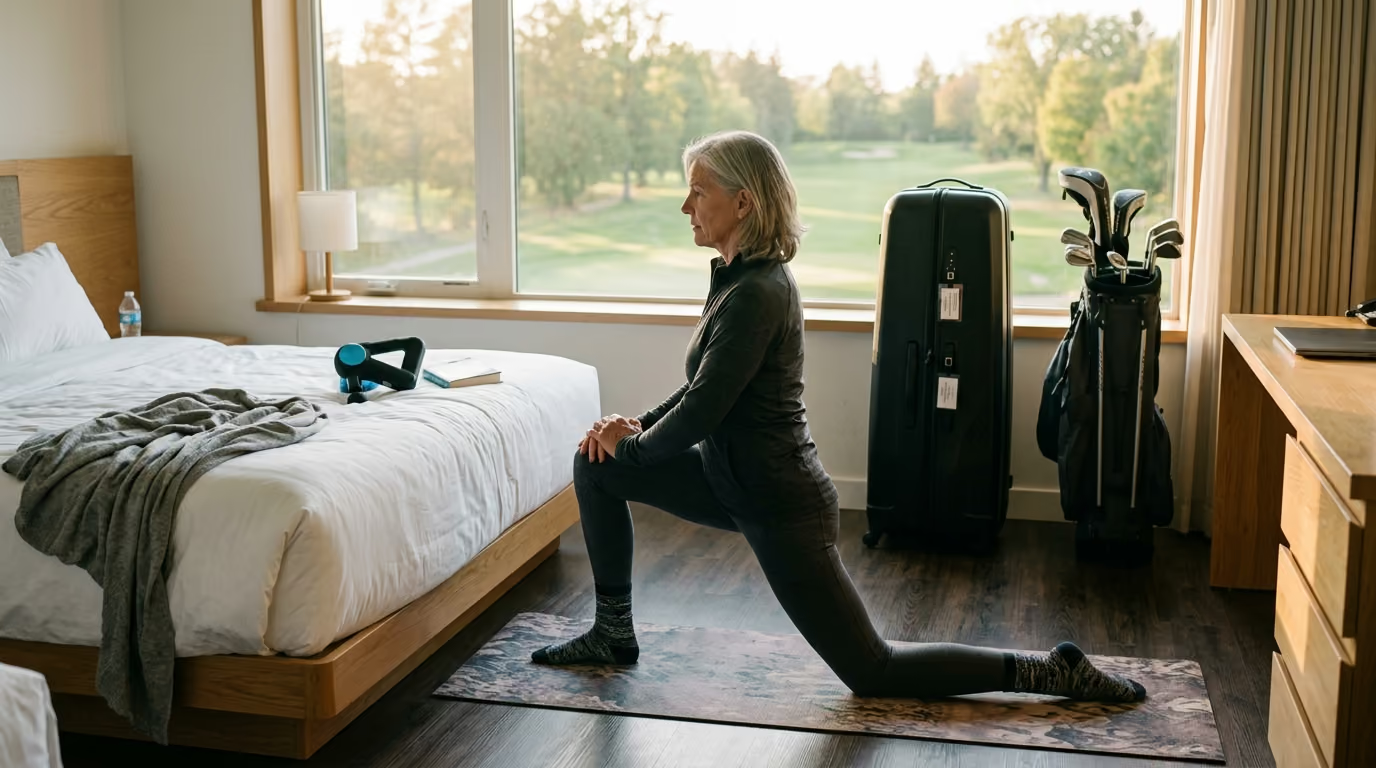
Tight hip flexors can pull your pelvis forward into an arch. This posture, called S-posture, increases the pressure on your lumbar discs. Stretching your hip flexors helps restore a neutral pelvis.
First, step into a half-kneeling position on a soft mat. Your front knee should be bent at ninety degrees. Your back knee should rest on the floor directly under your hip.
Next, focus entirely on tucking your pelvis under. Imagine pulling your belly button toward your chin. This pelvic tilt is vital for targeting the deep hip flexor muscle.
Gently push your hips forward an inch or two until you feel a stretch in the front of your back hip. Hold this stretch for thirty seconds. Breathe deeply and relax into the stretch. Perform two repetitions on each side. Integrating these movements supports healthy ageing practices for active golfers.
Many golfers make critical errors when trying to recover from a disc injury. These mistakes can delay your healing or cause a painful re-injury. Recognizing these pitfalls is the first step toward avoiding them.
The driver is the most exciting club in your bag. It is also the most dangerous for a recovering spine. The longer shaft of the driver increases swing speed. This speed creates massive rotational and shearing forces in your lower back.
Many golfers feel good during short game practice and immediately pull out the driver. This action is often referred to as picking the scab. The healing disc tissue cannot handle high-velocity loads yet.
You must progress through your clubs systematically. Only swing your driver after you can comfortably hit your fairway woods and hybrids. Your spine needs time to build tolerance to faster rotational speeds.
The driving range is a controlled environment. The hitting mats or grass tees are perfectly flat. This flat surface allows you to maintain a consistent, stable posture.
The golf course is rarely flat. You will face lies where the ball is above or below your feet. You will also face downhill and uphill slopes. These angled lies require significantly more core stability to manage.
Deep rough also poses a major risk. Hitting out of thick grass requires an explosive, forceful swing to move the clubhead through the turf. This sudden resistance can place sudden, high loads on your lower back.
For the first four to six weeks of course play, avoid difficult lies. If your ball lands on a steep slope or in deep rough, move it to a flat, safe lie. Your priority is protecting your healing spine, not keeping a strict score.
Steep sand traps are hazardous for a golfer with a history of disc herniation. Entering and exiting a deep bunker often requires climbing up and down steep, unstable slopes. This walking movement can place sudden, uneven loads on your spine.
Additionally, the explosive nature of a bunker shot requires a high-force swing. You must hit the sand behind the ball, which creates a sudden deceleration of the clubhead. This impact can transmit significant shock up the shaft and into your lower back.
Avoid playing out of bunkers during your first few weeks back on the course. If your ball lands in the sand, simply lift it and place it on the grass nearby. You can reintroduce bunker play slowly once your core stability is fully restored.
Many recreational golfers arrive at the course and walk straight to the first tee. They take one or two fast practice swings and tee off. For a golfer with a history of disc herniation, this cold start is highly risky.
Your spinal discs need physical movement to warm up. They lack a direct blood supply. They rely on movement to circulate fluid and nutrients.
A cold disc is less flexible and more vulnerable to tearing under rotational loads. You must prioritize a dynamic warm-up before every round of golf. Spend ten minutes performing pelvic tilts, arm circles, and gentle bodyweight squats. This routine prepares your joints for the demands of the game.
Your golf equipment can play a supportive role in protecting your lower back. Small changes to your gear can reduce the vibration and physical effort required during your swing. These choices are excellent golf longevity resources for keeping you on the course.
Heavy, stiff steel shafts require a high amount of physical force to swing. This force places extra strain on your muscles and joints. Switching to lighter graphite shafts can significantly reduce the load on your spine.
Graphite shafts absorb vibration much better than steel. This absorption protects your joints from the impact of hitting the ball. Consider moving to a regular or senior flex shaft. A more flexible shaft does more of the physical work for you.
If your grips are too small, you will naturally squeeze the club too tightly. This tension travels up your arms and into your shoulders and back. Tight muscles cannot absorb shock effectively.
Consider switching to midsize or jumbo grips. Larger grips allow your hands to relax. This reduction in tension promotes a smoother, more fluid swing that is gentler on your lower back.
Metal spikes or very aggressive plastic spikes lock your feet firmly into the ground. While this provides great traction, it also stops your feet from rotating. This lack of movement increases the twisting force placed on your knees, hips, and lower back.
Consider wearing spikeless golf shoes. Spikeless shoes allow for a small amount of natural foot slippage during the swing. This minor slippage acts as a safety valve, releasing rotational stress before it reaches your spine.
Carrying a heavy golf bag on your back is highly damaging to a herniated disc. The constant compression of the straps strains your lower back.
Using a riding cart is better, but bumpy cart paths can still cause painful spinal jarring. The best option is walking with a high-quality pushcart. Walking keeps your spine moving gently, while the cart holds the weight of your gear.
You should return to this playbook whenever you feel a minor increase in lower back stiffness. It is also wise to read these steps again before starting a new golf season. Re-evaluating your swing modifications and daily exercises will keep your spinal recovery on the right track.
Protect your lower back by keeping your hips mobile, your core stable, and your lead heel moving freely throughout your swing.
Follow Golfergy for practical insights on performance, mobility, recovery and healthy ageing. Stay connected for new articles, research-led guidance and ideas to help you play better for longer.


Explore practical resources on performance, recovery, mobility and golf longevity.
Read the Blog