
Learn how to distinguish between core stability and core strength to develop a resilient body and protect your spine for a pain-free golf game.




Many golfers believe that building a strong midsection requires endless sit-ups. They focus on getting a flat stomach to shield their backs. Yet research shows this approach is backward. Building thick outer abdominal muscles can make your back pain worse. A stiff, highly trained outer core often overrides the deep stabilizers that protect your lower back.
Real spine protection comes from timing and control. If your deep muscles do not fire at the right millisecond, your back absorbs the entire force of your swing. We need to focus on stability to play pain-free golf for decades. This guide helps you identify your postural patterns and build a resilient body for the course.
You stand on the fourteenth tee box of a long round. The wind is in your face. Your lower back feels tight and tired. You want to hit a long drive to clear the fairway bunkers. To prepare for a powerful swing, you bend at the waist. You stick your tailbone out to create what feels like an athletic setup.
This position is an exaggerated arch in your lower back. Your lower back muscles feel tight and short before you even swing. You take the club back. At the top, you feel a slight restriction in your hips. You swing down with force.
Instead of a smooth turn, your hips thrust forward toward the golf ball. Your upper body stands up to make room for your hands. You feel a sharp pinch on the right side of your lower spine as you hit the ball. The ball flies weak and off line to the right. This on-course pattern is a classic sign of pelvic instability.
This forward hip thrust is called early extension. It is not just a swing flaw. It is a protective reaction. Your body is trying to save your spine from a compromised position. When you start with an arched lower back, your muscles cannot support the joint.
Your brain forces you to stand up to keep from pinching your nerves. This movement pattern ruins your shot. It also places immense physical stress on your spine. Over time, this stress leads to long-term wear and tear. You can learn more about managing these physical patterns in our golf performance, recovery and longevity blog.
Many golfers create poor habits before they even move the club. Your address position determines how forces travel through your spine during the swing. Two primary posture patterns cause issues for recreational players. We call these S-Posture and C-Posture.
The S-Posture setup is characterized by an excessive arch in your lower lumbar spine. You can spot this if your tailbone points up and your lower belly hangs forward. This posture is also known as lower crossed syndrome. It is very common in golfers who spend long hours at a desk.
Research shows that about 25.3 percent of amateur golfers display S-Posture at address. Sitting all day makes your hip flexors tight. Your lower back muscles become short and overactive. Meanwhile, your glutes and deep abdominal muscles go to sleep.
When you stand over the ball, your pelvis tilts forward naturally. This tilt forces your lower back to arch. The bones of your spine, called vertebrae, are compressed. When you swing from this position, you compress the facet joints in your lower back. This compression is one of the most reliable predictors of lower back pain in golfers.
The C-Posture setup features a rounded upper back and shoulders. Your head hangs forward. Your spine looks like a capital letter C from your tailbone to your neck. Titleist Performance Institute research indicates that 33.1 percent of amateur golfers display C-Posture.
This posture is common in golfers who have tight chest muscles and weak upper backs. When your upper back is rounded, your thoracic spine cannot rotate. Try sitting in a slouch and turning your shoulders. You will find that you cannot turn very far.
To complete your backswing in C-Posture, you must get rotation from somewhere else. Your lower back is built for stability, not rotation. Yet, a rounded upper back forces your lower back to twist. This twisting can lead to disc herniation. You can find resources on structural balance through our golf performance and longevity resources.
To correct these patterns, you must learn to find a neutral spine baseline. Stand sideways in front of a full-length mirror. Set your feet shoulder-width apart. Let your arms hang naturally.
Close your eyes and stand in your typical address posture. Open your eyes and look at the shape of your back. If you see a deep hollow in your lower back, you are in S-Posture. If you see a rounded, hunched upper back, you are in C-Posture.
A neutral spine lies exactly between these two shapes. Your ears, shoulders, and hips should align vertically. Your lower back should have a gentle, natural curve that does not feel strained. This position is the safest starting point for any athletic movement.
Your pelvis acts as the steering wheel for your entire spine. It can tilt forward, which we call anterior tilt. It can also tilt backward, which we call posterior tilt. Both movements are normal when controlled.
Problems arise when you get stuck at one end of this spectrum. An anterior pelvic tilt pulls your lower vertebrae into a tight, pinched position. A posterior pelvic tilt flattens your lower back completely, removing its natural shock absorption.
Your goal is to be able to move smoothly between these two positions. Control over this spectrum protects your nerves from compression. It allows your hips to rotate freely. This mobility is a cornerstone of improving your rotational mobility.
Your body works as a series of alternating stable and mobile platforms. This concept is the joint-by-joint approach. If you violate this pattern, injury is almost guaranteed. Your body will find mobility wherever it can, even in places that should remain still.
Your hips are built to move in all directions. They need high mobility to rotate your lower body during the swing. Your thoracic spine, which is your upper back, is also built for mobility. It allows your shoulders to turn while your lower body stays anchored.
When these two areas are mobile, they absorb the rotational forces of your swing. Your muscles can stretch and release energy like a rubber band. This rotation creates clubhead speed without damaging your joints.
Your lumbar spine, or lower back, is built for stability. The vertebrae in your lower back are large and blocky. They are designed to support weight and resist twisting. Your lower back has only about 10 to 13 degrees of total rotational freedom.
If your hips or upper back are tight, your lower back must turn to make up the difference. This movement is dangerous. Forcing your lower back to twist under high speed causes major injury. It damages the discs that cushion your spine.
A stable core keeps your lower back quiet. It allows your hips and upper back to do their jobs. True core stability means keeping your lower spine still while your hips and shoulders rotate around it. This separation is the key to both power and safety.
Your rib cage and your pelvis are the two main bony structures of your torso. The space between them is supported only by your muscles and your spine. If this space is not stabilized, your spine will bend and twist under stress.
Think of your rib cage and pelvis as two metal rings. In a stable posture, these rings face each other directly. This alignment protects the soft tissues and nerves between them.
If your rib cage flares up, or if your pelvis tilts down, the rings are no longer aligned. This misalignment creates a weak spot in your midsection. The rotational forces of your swing will focus entirely on this weak spot. Keeping these two structures aligned is vital for spinal safety.
Your hip joints are true ball-and-socket joints. This design allows for a massive range of movement. Your hips can flex, extend, move sideways, and rotate inward and outward.
Your lower back joints, called facet joints, are flat. They are designed like tracks that allow you to bend forward and backward. They are not built to rotate.
When you force your lower back to rotate, you are forcing flat joints to slide sideways in a way they should not. This movement grinds down the protective cartilage. It can lead to early arthritis and severe pain. Letting your hips handle the rotation preserves your lower back joints.
Many golfers use the terms core strength and core stability interchangeably. This is a mistake. They are two entirely different systems in your body. Understanding this difference is critical for golf injury prevention practices.
Core stability belongs to your local stabilization system. This system consists of deep muscles that sit close to your spine. These include the transversus abdominis, the multifidus, and the pelvic floor.
These muscles do not create big movements. They do not help you sit up. Instead, they make micro-adjustments to protect your spine. They prepare your body for movement.
In a healthy body, these muscles fire a split second before you move your arms or legs. They act like a corset that cinches your spine. This timing is what keeps you safe. Core stability is about timing and coordination, not how much weight you can lift.
Core strength belongs to your global movement system. This system includes large, visible muscles like your rectus abdominis, which is your six-pack muscle. It also includes your external obliques and your gluteus maximus.
These muscles are designed to produce large forces. They rotate your torso and bend your body. They generate the speed you need to hit long drives.
If your deep stabilizers are weak, your global muscles try to do both jobs. They try to move your body and stabilize your spine at the same time. These large muscles are not built for precision. They quickly become tight, fatigued, and painful.
Many golfers spend hours doing crunches to build a strong core. They believe this will protect their backs. This is the six-pack fallacy.
Research published in the Journal of Science and Medicine in Sport shows that golfers with back pain often have highly active outer abdominal muscles. Their rectus abdominis is working overtime. This overactivity actually shuts down the deep stabilizers.
A rigid, overactive outer core makes your spine stiff. It reduces the natural flexibility you need for a smooth swing. It also increases the pressure on your spinal discs. You need a core that is responsive, not hard as a rock.
To understand how your core stabilizes your spine, think of a soda can. A sealed, pressurized soda can is incredibly strong. You can stand on top of it without crushing it.
If you open the can and release the pressure, it collapses easily. Your core works in a similar way. It relies on intra-abdominal pressure to create a supportive shield around your spine.
The top of this pressure canister is your diaphragm. The bottom is your pelvic floor. The sides are your deep abdominal muscles.
When these muscles contract together, they compress your abdominal cavity. This compression creates pressure that supports your spine from the inside. This pressure reduces the physical load on your spinal discs. It keeps your back safe during the high-speed forces of your swing.
You can test your pelvic control at home using a mirror. This test is called the pelvic tilt test. It reveals if your brain can communicate with your pelvic muscles.
Stand in your golf address posture. Place your hands on your hips. Now, try to tilt your pelvis forward. This movement arches your lower back.
Next, try to tilt your pelvis backward. This movement tucks your tailbone under and flattens your lower back. Focus entirely on moving your pelvis without moving your chest or head.
If your upper body moves back and forth, you lack pelvic control. If your legs shake or your movement is jerky, your deep core is struggling. Golf performance experts call this jerky movement the shake and bake pattern.
Research shows that 72 percent of amateur golfers display this shaky pattern during testing. In contrast, only 24.2 percent of PGA Tour players struggle with this movement. Pro players have excellent control over their pelvis. They can move their hips without moving their spine.
If you cannot control your pelvis slowly, you cannot control it at high speed. Your swing will default to S-Posture or early extension. Correcting this pattern is the first step to pain-free golf. You can read more about building functional body patterns on our golf longevity and performance homepage.
To get an accurate view of your pelvic control, use your smartphone. Set your phone on a tripod at hip height. Position it to record you from the side.
Perform five pelvic tilts forward and backward in your golf posture. Wear a fitted shirt so you can see the curve of your spine. Watch the video back in slow motion.
Look closely at your chest and knees. They should remain completely still. If your knees bend and straighten, you are using your legs to move your hips.
If your chest moves forward and backward, you are using your upper back to create the movement. A perfect test shows your pelvis tilting smoothly. Your upper body and lower legs should remain stationary. This separation is key to a healthy swing.
Many golfers fail the pelvic tilt test and assume their muscles are too tight. This is often not the case. The issue is usually a lack of motor control.
Motor control is how your brain communicates with your muscles. If you do not use a movement pattern for years, your brain loses the pathway to control it. Sitting at a desk for long periods weakens this brain-body connection.
Your muscles are physically capable of moving. Your brain has simply forgotten how to coordinate the movement. The good news is that you can rebuild these pathways. Regular practice of pelvic control exercises can quickly restore this vital connection.
If you feel your lower back tightening during a round, you need a quick reset. You can do this on the tee box or the fairway. This exercise helps you find a neutral pelvic position.
First, stand with your feet shoulder-width apart. Rest your golf club across your thighs. Hold the club in place with both hands.
Now, tilt your pelvis forward as far as you can. Feel your lower back arch and your chest lift. Hold this for two seconds.
Next, tuck your tailbone under as far as you can. Feel your glutes squeeze and your lower back flatten. Hold this for two seconds.
Finally, move your pelvis to the exact middle of these two extremes. This middle point is your neutral spine position. Your lower back should have a very slight, comfortable curve. Your abdominal muscles should feel lightly engaged.
Use this feeling when you address the ball. Before each swing, tilt forward and backward once. Find that neutral middle ground. This quick habit keeps you from starting in a damaging S-Posture.
Another excellent on-course quick fix uses your driver to check your posture. You can do this while waiting for your playing partners to tee off. It provides instant feedback on your alignment.
Hold your driver behind your back. The shaft should run straight along your spine. One hand should hold the club against the back of your head.
The other hand should hold the club in the curve of your lower back. The shaft should touch three points on your body. These are the back of your head, your upper back, and your tailbone.
Slowly bend forward into your golf address position. Check that the shaft continues to touch all three points.
If the shaft lifts off your tailbone, you have rounded your upper back into C-Posture. If the shaft pulls away from your upper back, you have arched your lower back into S-Posture. This simple drill teaches your body what a flat, neutral spine feels like in real time.
To protect your spine long-term, you must train your core to resist movement. Your core should act as a shield. These exercises focus on preventing unwanted movement rather than creating it. You can build these into your weekly routine to assist with strength training for longevity.
This exercise trains your core to keep your spine flat against the ground. It stops your back from arching during your swing.
This exercise trains your core to resist twisting. It teaches your deep stabilizers to keep your lower spine quiet while your limbs move.
This drill improves your pelvic awareness. It helps you decouple your pelvic movement from your upper body.
This exercise builds stability across the back of your body. It coordinates your glutes, lower back, and shoulders.
This exercise teaches your upper body to rotate while your lower body remains completely stable. It replicates the separation needed in the golf swing.
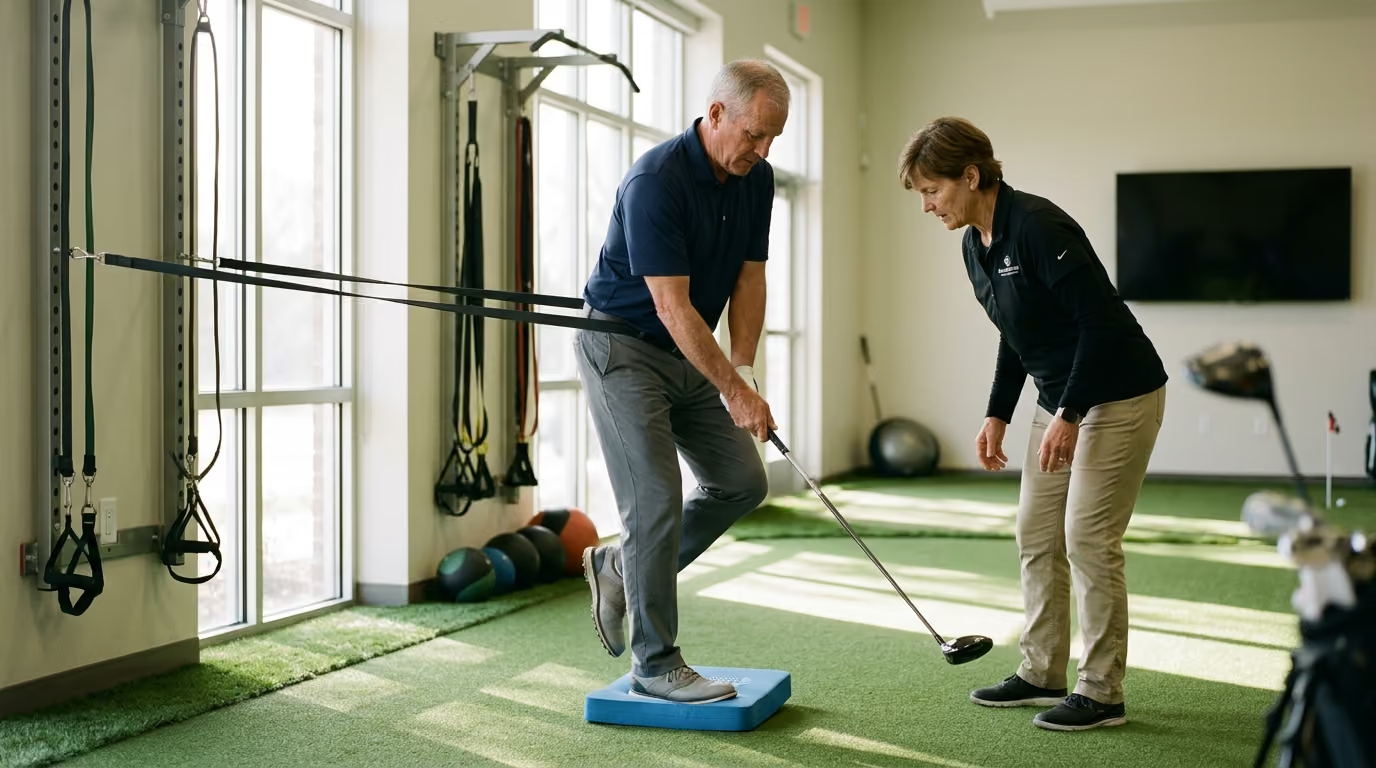
Many fitness trainers love using unstable surfaces. They have golfers stand on rubber discs or half-balls to do squats and turns. They claim this builds better balance and core stability.
However, research shows this can be counterproductive for golfers. When you stand on a soft, moving surface, your brain gets confused. Your feet cannot get a solid grip on the ground.
To keep from falling, your body stiffens up. Your muscles lock your joints to keep you upright. This stiffness is the opposite of what you need for a golf swing. A stiff body cannot rotate smoothly.
Furthermore, golf is played on solid ground. Your swing depends on how well you push against the earth. This is called ground force reaction.
Training on a soft cushion reduces your ability to create ground force. It teaches your nervous system to be slow and cautious. To build true golf stability, train on a solid, flat floor. Save the balance boards for rehabilitation after an ankle sprain.
Your feet are your only contact point with the golf course. To swing a club fast, you must push down into the ground. The ground pushes back up with equal force.
This force travels through your feet, up your legs, and into your pelvis. Your core must be stable to transfer this force to your upper body. This transfer is how you create clubhead speed.
If you train on a soft surface, you absorb these forces instead of transferring them. Your brain learns to dampen the energy. To hit longer drives, you need a core that can transfer force from a solid surface.
Another common mistake is trying to keep your core permanently locked. Some golfers try to squeeze their abdominal muscles throughout the entire round. They believe this protects their lower back.
This practice is called core hardening. It is a dangerous mistake. Over-stiffening your core limits your natural movement.
Your spine needs a small amount of natural movement to absorb shock. If you lock your muscles, the shock of your swing travels directly into your joints. It also makes your breathing shallow, which causes early fatigue. True stability is an active system that turns on and off as needed.
Traditional sit-ups and crunches are poor choices for golfers. They train your body to flex your spine forward. This movement is the exact opposite of what you need on the course.
Crunches build strength in your rectus abdominis. This is your outer, superficial muscle. As we have seen, overactive outer muscles can turn off your deep stabilizers.
Furthermore, crunches place high pressure on your spinal discs. They bend your spine in a way that compresses the front of the discs. Over time, this repetitive bending can lead to a herniated disc. Focus instead on exercises that teach your body to resist movement.
Your physical posture is also influenced by the gear you use. Small adjustments to your equipment can relieve pressure on your lower back.
Many modern athletic golf shoes have thick, cushioned heels. This design lifts your heel higher than your toes. This difference is called the heel drop.
A high heel drop shifts your body weight forward. To keep your balance, you must arch your lower back. This shift places you directly into an S-Posture.
Look for golf shoes with a low heel drop. These shoes keep your feet flatter to the ground. This position makes it easier to keep your pelvis neutral. Your weight will distribute naturally through your heels.
If your clubs are too short, you must bend over too far at address. This extra bend makes your upper back round into a C-Posture. It also forces your hip flexors to contract deeply.
If your clubs are too long, you will stand too upright. This position can make you swing with a flat plane. You might tilt your spine sideways to hit the ball.
Visit a professional club fitter to check your specifications. Correct club length allows you to stand comfortably. Your spine can stay in a neutral position throughout your swing. This adjustment is a simple way to practice better injury prevention.
The size of your grips can affect how your shoulders and upper back align at address. If your grips are too small, you must squeeze the club tightly. This extra hand tension travels up your arms.
It causes your chest muscles to tighten and pulls your shoulders forward. This movement patterns directly into a C-Posture.
Larger grips can reduce hand tension. They allow your forearms and shoulders to remain relaxed. This relaxation helps you keep your chest open and your upper back flat. A simple grip change can make a massive difference in your posture.
How you transport your clubs around the course affects your back health. Carrying a heavy bag on one shoulder places an uneven load on your spine. It forces your core muscles to contract unevenly for four hours.
This repetitive stress can cause muscle spasms and joint misalignment. Even dual-strap bags can compress your spine if not fitted correctly.
Using a push-cart is a much safer option for your lower back. It keeps your spine free from heavy loads. It allows you to walk with a natural, upright posture. This simple change preserves your core energy for your shots.
We often think of larger, heavier players as being more prone to injury. However, sports science reveals an interesting pattern. The highest predictor for lower back pain in golfers is actually a low body mass index.
Specifically, golfers with a body mass index under 25.7 are at a higher risk of back injury. These are often tall, slender players.
Tall players have longer levers. Their long limbs create immense torque during the swing. This torque puts high stress on their joints.
If a tall player has a narrow waist and thin core muscles, they have less natural mass to absorb these forces. They cannot rely on sheer bulk to stabilize their spine. They must be extra diligent about their mobility and stabilization training.
If you fit this tall, slender profile, do not focus on getting heavier. Focus on building exceptional deep core stability. Verify your local stabilizing muscles are strong and fast. This training acts as a muscular suit of armor for your long spine.
In physics, torque is calculated by multiplying force by the length of the lever arm. Tall golfers have longer arms and legs. This structural length creates a longer lever arm.
When a tall golfer swings, the forces generated at the club head are amplified as they travel down to the spine. The rotational load on their lower back is significantly higher than that of a shorter player.
Without a strong deep core, these forces will cause the spine to shear. This shearing stress is what damages the delicate discs and nerves. If you are tall, your core must be twice as stable to manage these forces.
Many tall, lean golfers are naturally flexible. They can turn their shoulders past ninety degrees easily. This flexibility can be a trap.
Often, this movement is not controlled. It is a passive flexibility that relies on the stretching of ligaments rather than muscle control.
When you stretch your ligaments too far, they lose their ability to support your joints. This instability leads to micro-movements in your spine during the swing. These tiny shifts compress your nerves and cause chronic pain. Tall players must balance their natural mobility with focused stability training.
Your hips and lower back are closely connected. If your hips cannot turn, your lower back will be forced to move. The most critical joint movement for a right-handed golfer is lead hip internal rotation.
During the downswing, your body rotates around your lead leg. Your lead hip must turn inward to let your pelvis clear. Research shows that golfers with less than 20 degrees of lead hip internal rotation are highly likely to suffer from lower back pain.
When your lead hip stops turning, your pelvis stops moving. Your upper body keeps moving, which forces your lower back to twist. This twisting under load causes muscle strains and disc issues.
To protect your spine, focus entirely on turning your lead hip during your warm-up. Stretch your hip joint before you head to the first tee. If you feel tightness in your hip, do not force your swing. Take a slightly wider stance and flare your lead foot outward. Flaring your foot opens the hip joint and makes rotation easier.
When your hips clear during the downswing, they move out of the way to create space for your arms. This clearing is a combination of rotation and lateral shift.
If your lead hip is tight, your pelvis cannot clear. Instead of rotating, your pelvis will slide forward toward the ball.
This slide is the early extension pattern we discussed earlier. It forces your spine to stand upright and pinch. Improving your lead hip rotation allows you to clear your hips smoothly, keeping your spine safe.
You can perform a simple hip stretch using your golf cart or a bench before your round. It takes only two minutes and pays huge dividends.
Stand facing your golf cart. Place your left foot up on the seat or step. Your knee should be bent.
Slowly turn your hips and torso toward the left leg. Keep your foot flat and your knee pointing forward. Feel a gentle stretch deep in your left hip joint.
Focus entirely on turning your pelvis around your thigh bone. Hold this stretch for thirty seconds. Repeat on the other side. This simple movement prepares your hips to rotate, sparing your lower back from twisting.
Many golfers think of golf as a low-impact sport. They compare it to running or tennis. However, the forces acting on your body during a golf swing are incredibly high.
Biomechanical studies show that the rotational load on a golfer's spine is immense. It approaches the forces experienced by professional football linemen hitting a blocking sled. These forces occur in a fraction of a second.
During the downswing, your spine is subjected to compression, shear, and bending forces all at once. In laboratory studies on cadaver spines, these combined forces often exceed the limit required to herniate a spinal disc.
Your body survives this swing only because of your muscles. Your deep core acts as a protective brace that absorbs and distributes these forces. If your core is not firing correctly, your joints and discs absorb the impact. This is why building stability is not optional if you want to play long-term.
To understand how these forces damage your back, imagine a copper wire. If you bend a copper wire back and forth, it eventually snaps. If you twist it, it weakens.
If you bend, twist, and compress it at the same time, it breaks almost instantly. This is exactly what happens to your spinal discs when you swing with poor posture.
At address, S-Posture places your spine in a compressed, bent position. During your backswing, you twist this compressed spine. On the downswing, you add side-bending forces.
This triple combination is the ultimate threat to your back. It is the primary cause of disc tears, herniations, and nerve compression. Keeping your spine neutral eliminates the bending and compression, leaving only safe rotation.
Because the forces of the swing are so high, your spine actually compresses during a round. The discs lose moisture and flatten slightly. This is why you might feel shorter or stiffer after eighteen holes.
To recover quickly, you must help your spine decompress. This is a crucial element of your post-round recovery.
Simple passive positions can help restore moisture to your discs. For example, lying on your back with your legs bent and resting on a chair relieves all pressure on your lower back.
Holding this position for ten minutes after your round allows your discs to rehydrate. It turns off active muscle spasms. This simple practice keeps your spine healthy between rounds.
Your pelvic floor is a group of muscles that support the organs in your pelvis. They form the bottom of your core pressure canister. These muscles must work in harmony with your diaphragm to protect your spine.
When you breathe in, your diaphragm moves down. This increases the pressure in your abdomen. To balance this pressure, your pelvic floor must relax slightly.
When you breathe out, your diaphragm moves up. Your pelvic floor contracts and lifts. This natural rhythm is crucial for stabilizing your spine.
Many golfers hold their breath during their swing. They tighten their chest and neck. This breaks the pressure system, leaving their lower back unprotected.
To keep your core canister working, you must coordinate your breathing on the tee. Never hold your breath as you start your backswing.
As you stand over the ball, take a deep breath in through your nose. Feel your lower belly expand sideways. This inhalation increases your internal pressure.
As you begin your takeaway, let out a soft, slow exhale through your mouth. This exhalation activates your deep stabilizers and pelvic floor naturally.
It creates a natural brace for your spine before the high-speed phase of your swing. It also reduces tension in your shoulders and hands, allowing for a smoother tempo. This breathing pattern is a simple way to protect your back on every shot.
Many golfers do not realize that pelvic floor health is directly linked to lower back pain. If your pelvic floor is weak or too tight, it cannot manage pressure changes.
This inability leads to instability in your pelvis and lower spine. It can cause a dull, chronic ache in your lower back that does not respond to stretching.
Research shows that training the pelvic floor along with the deep abdominals significantly reduces lower back pain. It improves overall pelvic stability.
Do not ignore these deep muscles because they are invisible. They are the foundation of your core. Keeping them healthy is vital for your long-term performance.
Protecting your spine is not about avoiding golf. It is about preparing your body for the physical demands of the game. When you build core stability, you protect your body from injury. This allows you to play the game you love for many years to come. You can find more advice on maintaining your health as you age in our healthy ageing section.
A healthy spine also makes your swing more consistent. When your core is stable, your body can rotate around a solid axis. This consistency leads to better ball striking and lower scores.
Do not wait until your back hurts to start taking action. Begin incorporating anti-extension and anti-rotation exercises into your weekly routine today. Pay attention to your posture at address. These small adjustments will pay major dividends on the course.
Your swing will feel smoother and more powerful. Best of all, you will walk off the eighteenth green feeling fresh and ready for another round. Taking care of your body is the ultimate way to enjoy the game of golf.
Focus entirely on keeping your lower spine quiet while your hips and shoulders rotate around it.
Follow Golfergy for practical insights on performance, mobility, recovery and healthy ageing. Stay connected for new articles, research-led guidance and ideas to help you play better for longer.


Explore practical resources on performance, recovery, mobility and golf longevity.
Read the Blog